Hello everyone and welcome once again to my blog.
So lovely to have you visit and I hope you are having a fabulous day!!
Today I'd like to share with you a set of Mini books and the File Folder box to keep them in. This is a design download purchased from Marion Smith Designs and it was great fun and very easy to put together. The download includes templates for most of the required pieces. The only things you need to measure out for yourself is the outside cover of the File Folder, but she gives you all the necessary information to make this very easy to do. Marion actually has a video tutorial on this project and, if you'd like to take a look for yourself, you can find it HERE.

The papers I've used for the outside of the box and for the covers of the mini Books are from Prima's Engraver A4 Paper Pad.

The pattern includes this concertina fold for both sides of the box. It is simply a matter of printing it, cutting around the outside and then scoring the fold lines.

The back view.

I haven't done a lot of decorating on this. As a matter of fact, I've done very little. This is the cluster on the top of the box. The large gardenia was originally white. I've simply coloured it slightly with some watered down Tea Stain Distress Ink to make it blend in better with the papers. The skeleton leaves were cut with my Silhouette from green cardstock and I've coloured those with Walnut Stain Distress Ink for the same reason. I've also added in some paper and fabric flower buds and some autumn leaves. The autumn leaves and the gardenia are available from Meg's Garden HERE. The paper bud is from Magnolia Ink and the fabric buds are from my stash. There is also a small green gem spray from Magnolia Ink but that is a bit difficult to see here.

For the cluster on the front I've simply used the same skeleton leaves, some small Kaisercraft Roses and a white gem spray.

The open File Folder showing the mini books snuggled inside. You can also see the Velcro I've used for the closure of the folder ...
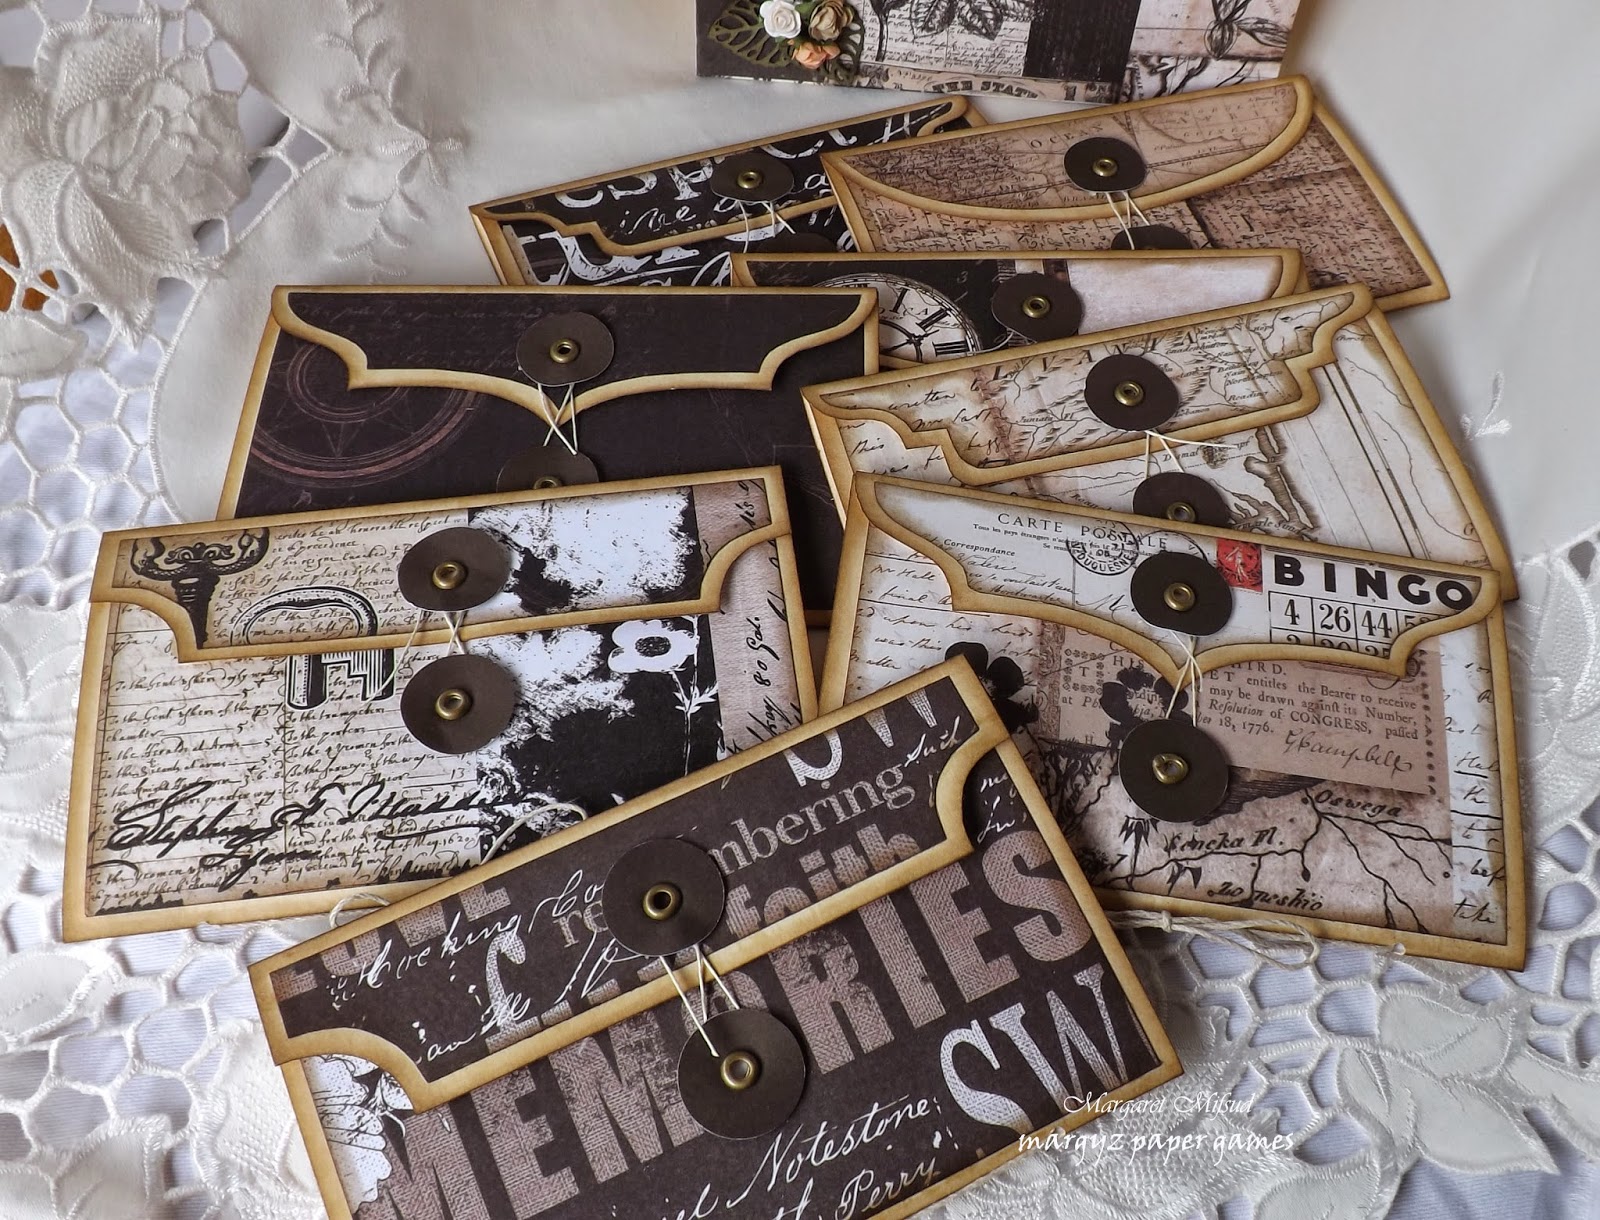
... and here are all the little books. The base of each of these is a print out and then you simply cover them with the papers of your choice. You don't even need to measure your dp as there are templates for that too , including those for the flaps.

Just a closie of one of the books. You can make up your own mind as to what kind of closure to use.

This is the inside of the book. You simply punch the holes through the cover and the paper and then thread through some twine and tie it off. So simple!!

I've glued an ornate metal plate on the front flap and used Velcro to hold the folder closed.
This was a fabulous little project to make. Really easy to put together. The only fiddly bit was attaching the concertina sides to the cover but even that was not really difficult. It just came together really well and I'm certainly going to make more of these. I think they would make a lovely little gift.
Sooooo, I'm thinking you might be wondering what I'm going to use this for????? Well, I needed somewhere to write down all the bits and pieces used on the cards I make so that when I write up my Blog Posts I'll have all the information at hand, and that's what these little books will be for. Am I clever or what????? Actually I just have a pretty bad memory and am sick of having to get up a dozen times or more to find the name of what I've used on a specific card or project. LOL!!
Will be so much easier now. That is if I remember to write it down!!!!!
Thank you all so much for taking the time to visit and I do hope you enjoy the rest of your day.
Take care and God Bless.
oxox Marg
You made me laugh Marg because I'm so forgetful too but this is a great idea and beautiful too, love it heaps.
ReplyDeleteOh Marg this is such a fab project, love how it turned out and yes, it would make a brilliant gift. I am definitely going to check out the link, I really like the idea of it and boy, I could do with some of those little notebooks too! I had to smile big time when I read that bit, it sounds very familiar!!
ReplyDeletewowzer Margy, love love love ... stunning papers too .. are they Prima ? great idea and love the little books inside . how big is this project, difficult to tell ... love this x
ReplyDeleteThanks Heather, so glad you like it. The booklets measure six and a half inches by four inches, so it's not very big at all. ox
DeleteThis is brilliant Marg - love it to bits.
ReplyDeleteThis is amazing Marg! You are so clever, love the colors too. Well done! Very pretty and practical!
ReplyDeleteBeautifully done Marg. Love all the little books and vintage papers. Karen.x
ReplyDeleteSeriously you are so clever at these keepsakes. I am in awe! Yet another stunning masterpiece, Margaret! x
ReplyDeleteSuch a beautiful folder and perfect for keeping precious memories. You are so clever Marg... I love this beautiful piece of art.
ReplyDeleteWow! This is pure genius!! Congrats on a stunning project!!!
ReplyDelete