Thursday 30 June 2016

Masculine in a Softer Tone and some Happy Mail!

Hello my sweet visitors, so lovely to have you drop by.  I hope everyone is having an awesome day and that the weather, wherever you are, is being kind.

I am back today to share another of my masculine cards.  As the title suggests, this one is a more gentlemanly (is that a word???  LOL!!) version.  I have used softer colours and not much in the way of grunge.

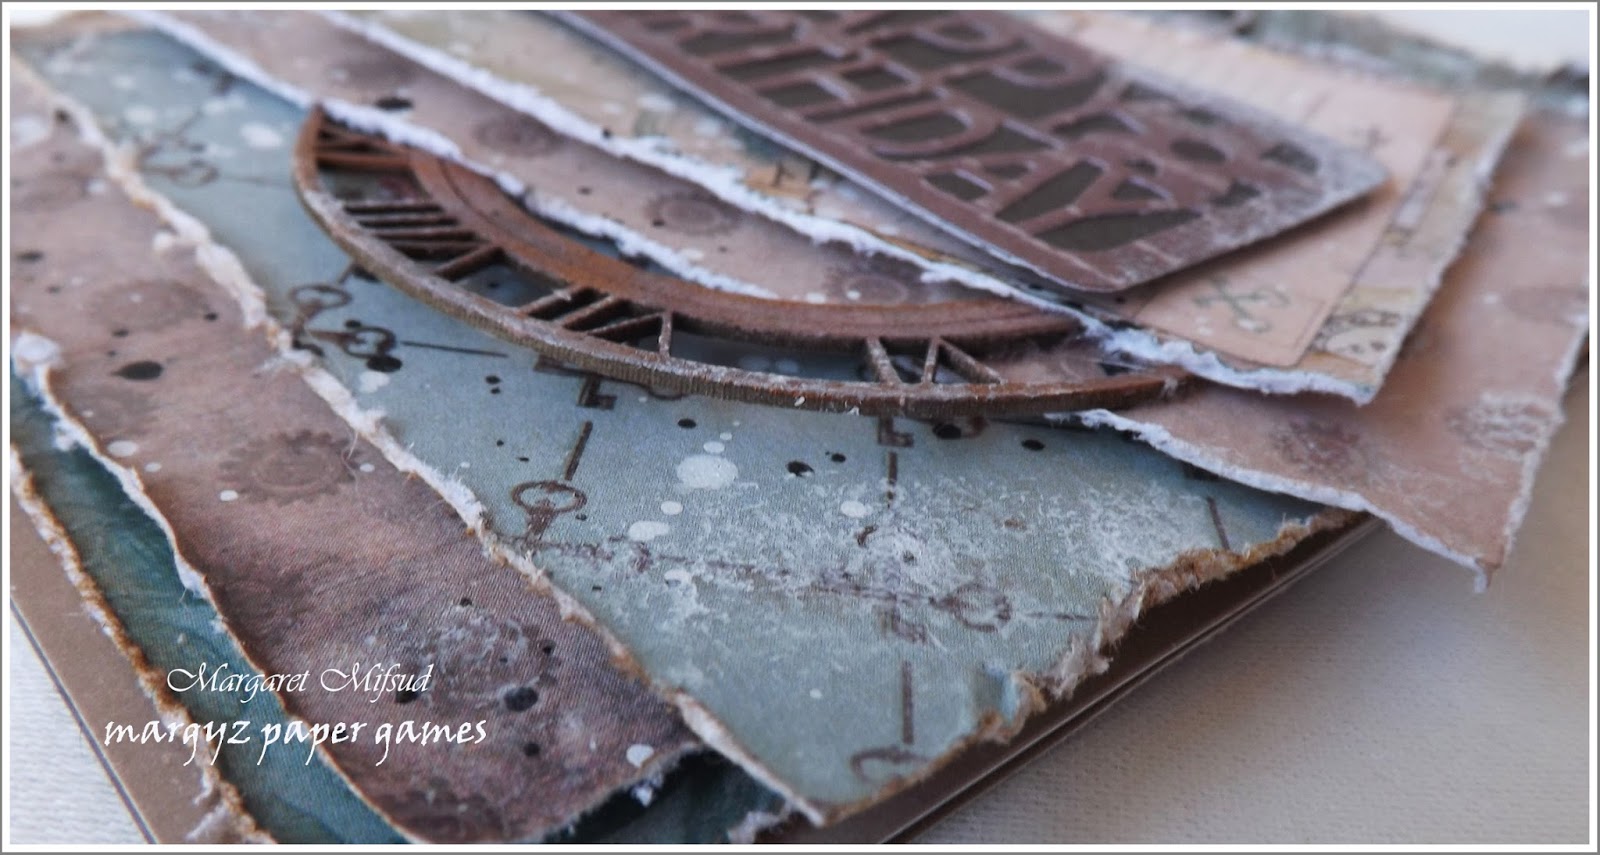
The papers are from Kaisercraft's Heritage Paper Pad.  Love these papers, they are just gorgeous and suitable for feminine as well as masculine makes.

The chippie is from 2Crafty Chipboard and all I've done is randomly swiped them with VersaColor stamp pads .. a little black, brown and bronze. 

Found the 'Happy Birthday' die in my stash but have no idea who makes it.  Cut it from the same papers and just mounted it on some brown cardstock.

This chippie is also from 2Crafty and is a piece that was left over from another make.  Coloured it the same as the bubble chippie.

At the back of the Kaisercraft Paper pads they usually add a few pages of pop-out labels, tags and borders.  I added some eyelets and bits of twine to two of those tags and tucked them in under the layers.

Some random closies ..


Swiped some gesso around the card and also splattered it with black and white ink.

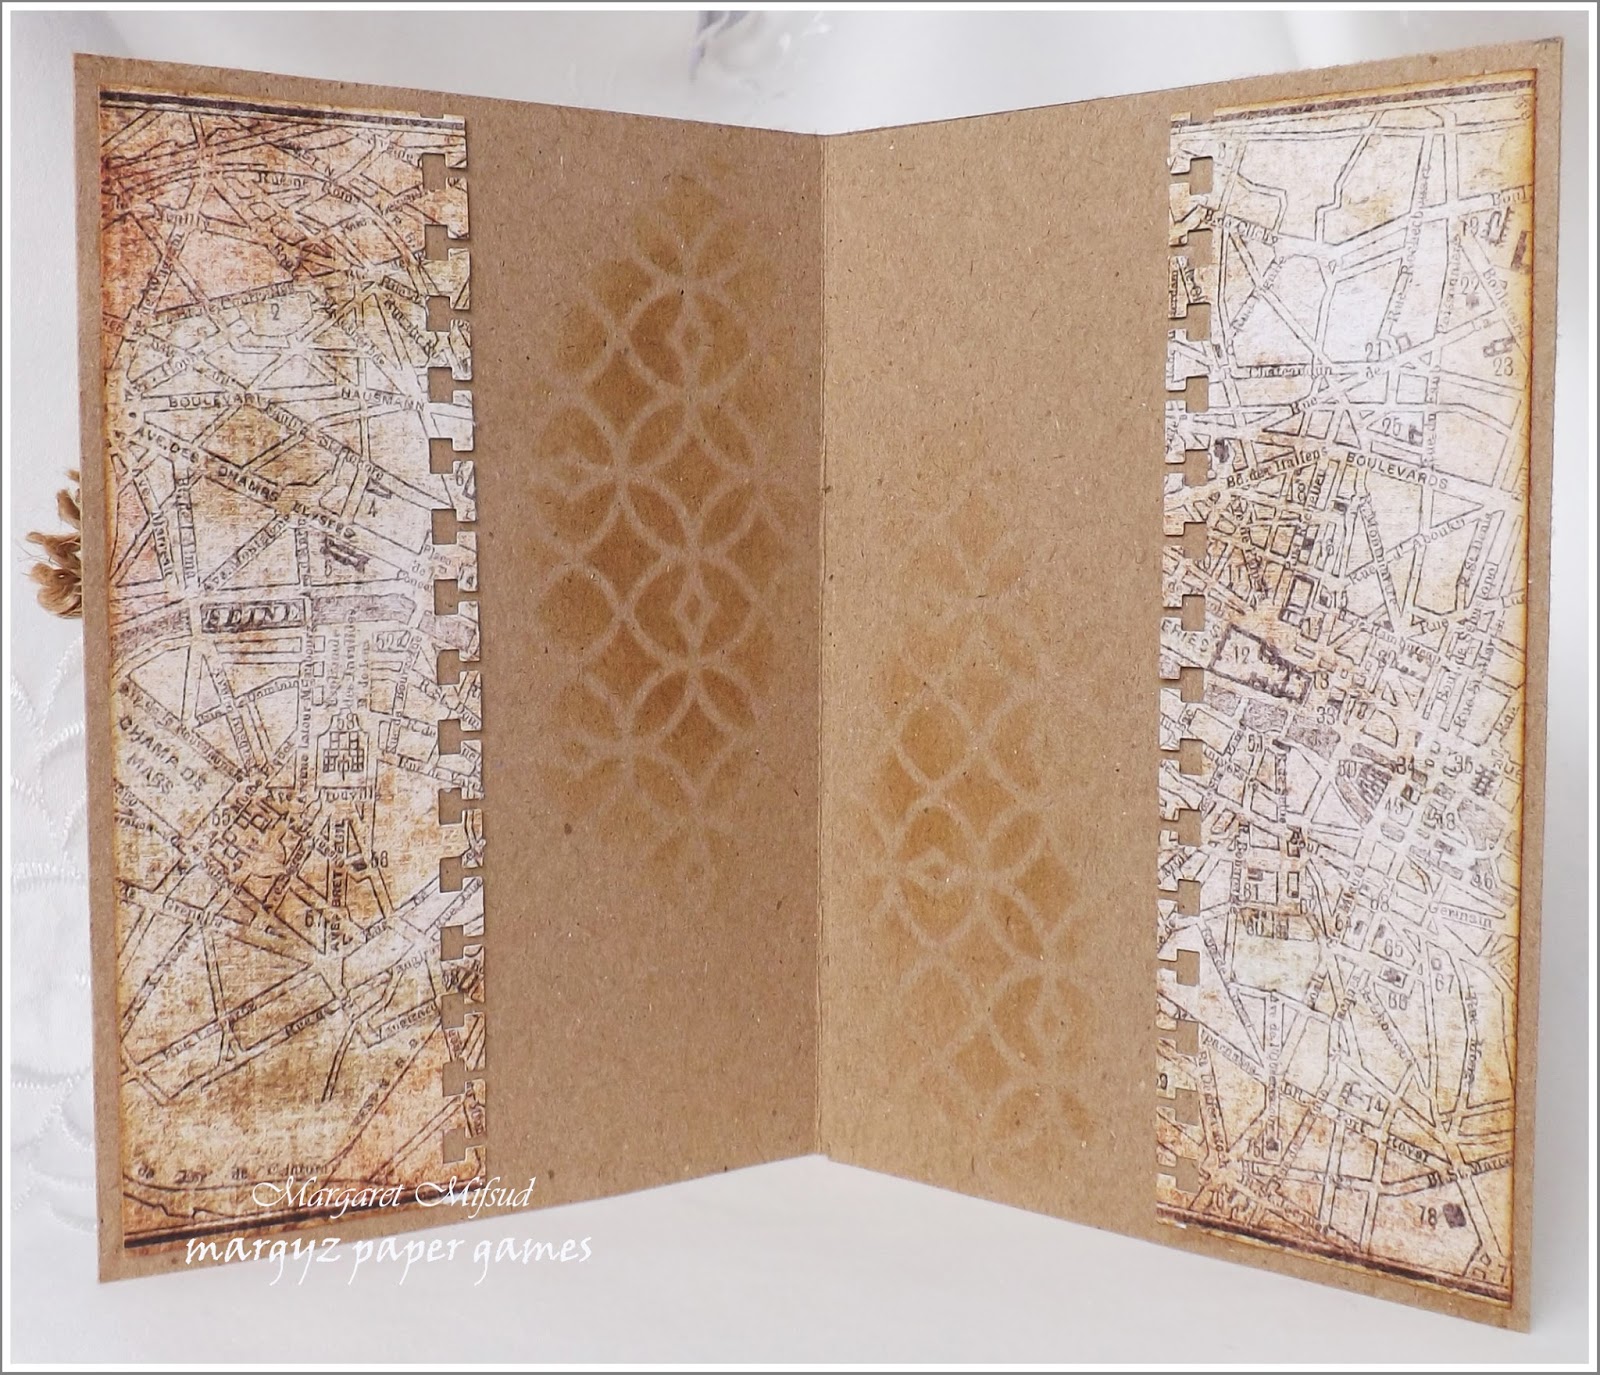
Added pockets and did a little stamping on the inside ..

.. and, voila!!  Done and dusted!

So that's my card and now for the Happy Mail!!

A few weeks ago Adriana Bolzon from  AB Inspirations  ran a little competition.  All we had to do was leave a comment either on her blog post or on her fb page and there were three prizes to be won.  Each was a set of four little travel tags .. and I won a set!!!  I was so thrilled because I thought they were so cute .. well, I got them in the mail yesterday and they are more than just cute .. they are absolutely gorgeous and so beautifully made .. I totally adore them!!!  Thank you so much Adriana .. I am stoked!!  Can't wait to use them.


If you'd like to see how Adriana put these little cuties together she has a tutorial on her blog HERE.  I urge you to go over and take a look at her work .. you will love it!!

Well, that's all from me for today.  Thank you so much for popping in and do enjoy the rest of your day.
Take care, stay safe and God Bless.

We Learn something from everyone who passes through our lives ...
Some lessons are Painful, some are Painless ...
but ALL are Priceless.

Monday 20 June 2016

A 'Manly' Card

Hello everyone and welcome to my blog, so pleased you came for a visit.  A special welcome to my new followers, thank you so much for joining me on my creative journey!!
Hope you are all having a wonderful day.

I'm back to share another 'man' card with you today.   Have seen lots of comments about how difficult 'man' cards are to make and, in a way, I do agree.  Being female, I guess feminine is so much simpler anyway .. I just go with the things I like.  Find some pretty paper, pop on a few flowers, maybe a bit of glitter, etc. but what do you put on man cards???

Well, the basic designs are similar to my feminine cards but I mainly stick with paper layers and then add some clocks, or cogs, maybe some eyelets  .. anything really that is a bit more 'macho'.  The men in my life simply would not like flowers on their cards (they are too 'manly' for that .. LOL!!) so I steer well clear of those or anything else that's considered feminine (like butterflies .. he! he!).  I add twine, maybe some burlap ribbon or some of that dry wall tape that was all the rage a little while ago .. I have even in the past, added small pieces of gutter guard to build them up ..  you could also add in graphics of motorbikes or cars .. all those kinds of 'boy toys' .. as I said, anything that looks a bit more on the manly side.  I don't think  male card are more difficult to make but you do have to put yourself into more of a 'man' frame of mind and that (I think) is the most difficult part.

Anyhow, enough of my rambling, here is my card. 


The papers are from Prima's Cartographer 6" Paper Pad and all the edges have been distressed, as you can see.


Added some metal trinkets.


Think this is only the second time I have actually used some staples .. must say I like it!!  Should do it more often.  The tiny bit of stamping was done with Archival ink and Kaisercraft's 'Arty' stamp.


Popped in some eyelets and attached some twine to the tag.  The little clock was found in my stash.  I must have made it up ages ago.  Not sure where the print came from but, I had punched it out, glued it to a piece of chipboard and then covered it in Glossy Accents.  Comes in handy sometimes to have these pre-made embellies .. will have to make some more.


I tried to heat emboss the greeting but had so much trouble with it.  Did it a couple of times but just couldn't get it crisp and clean.  Was left with all these little blobs around the words .. looked like it had measles .. LOL!!  So I just stamped it instead.  It'll do!


Pockets on the inside for a voucher and a personal message.  Punched the edges with EK Success 'Binding Edge' and the bit of stenciling was done with 'Gathered Twigs' Distress Ink and Tim Holtz 'Latticework' stencil.


A few splashes of black and white ink and ..  voila!!  Done and dusted!!

So, there you go .. another card ready and waiting to be posted off.  Always glad to get another one finished.

Thank you so much for dropping by today.  I do hope I have passed on a little inspiration.

Take care, stay safe and enjoy the rest of your day.
God Bless.

I know God has a plan.
I pray for the Patience to wait for it,
the Direction to follow it,
and the Wisdom to know when it comes. 


Thursday 9 June 2016

A Birthday in Pastel Shades.

Hello my lovely visitors and welcome to my blog.  So pleased you dropped by.


June and July are fairly busy months for me as far as card making goes.  Lots of rellies and friends having birthdays .. luckily I do have some cards in reserve but I still have quite a few to make as well.  The inspiration for the card I am sharing today came from the pastel coloured papers I found in my stash.


I was looking for something light and pretty and these papers were perfect.  They are from an older Kaisercraft collection but I have no idea which one.  


Coloured the flowers with some watered down acrylic paint.


Lots of layers  .. papers and different laces.


 Added a small piece of gauze, a twine bow, a gem spray and a chipboard piece from 2Crafty Chipboard.


The flowers and the laces are all available from Megs Garden.


The leaves were cut with my Silhouette Portrait.  Awesome little machine!!


Two pockets on the inside .. one for a gift voucher and the other for a personal message written on a journal card.


Some splashes of white paint to finish!!  Done!!

I am really happy with the way this card turned out .. and it came together quite quickly too.  Simply went with the flow.   So, I guess I haven't lost my mojo where cards are concerned.  Yayy!!

Thank you so much for dropping by and for any little comment you may care to leave.
Take care, stay safe and God Bless.

Creativity is contagious.  PASS it on.

Saturday 4 June 2016

A Christmas Card and some Holiday Pics

 Hello my lovely visitors and welcome to my bloggy space.  Hope you are all having a wonderful day.

Before I went away on holidays I mentioned that my mojo had gone AWOL and I was hoping that, when we returned, it would all be ok again.  Unfortunately that didn't happen .. the cobwebs are well and truly still in place.  I had started a couple of bigger projects that I was having problems with and still am not able to concentrate on them to get them right.  So, for a while, I am going to focus on just making cards and tags and maybe get back into some Art Journaling.   Hopefully, mojo will return soon, and then I can finish those pesky projects off .

So, I made this simple Christmas card .. and quite enjoyed it too!

The papers are from Kaisercraft and the top layer was cut using one of the new dies from Tim Holtz. 


Added a small piece of gauze under the cluster.  The baubles were taken from a cheap Christmas decoration and the pine boughs were cut with an Impression Obsession die.  Think I have used these items on every one of my Christmas cards this year.  Just love the look I guess.


I've had these gold stickers in my stash for years and am finally getting around to using them.  Simply stuck them on a small banner .. so easy.


The fabric flowers were hand made with some ribbon.  I followed a tutorial by Pamelia Johnson from
My Little Craft Things.  Mine are not as pretty as hers but I'm still happy with them.  HERE is the link to Pamelia's post which includes the video.


The inside .. with a little pocket at the bottom and plenty of space for a personal message.


Added a few splashes of white paint .. and that was it .. done and dusted!!

I set myself a schedule at the beginning of the year to make at least 2 Christmas cards each month.  Well, I'm way behind .. should have made about 10 by now but this is only No. 5.  Still, that's 5 more cards than I had at this time last year so I'm pretty happy with that.

Now, for those of you who may be interested, here are a few shots from our holidays.
We went on a Cruise to the South Pacific and these were shots taken at our first port of call.  This is the island of Lifou in New Caledonia.  It is part of the Loyalty group of islands.  I believe it is actually the largest one in the group.


This was taken from the ship as we were coming in ..


.. as was this one.


Have no idea what the place is called where we landed.  It was quite small with a few huts and a little market.  This little place did hair braiding .. not a good look for some!!  LOL!!  We had the option of going on different excursions but didn't bother this time.


It was really hot and humid so it was good to get out of the sun.  I bought a fan at that market  .. really needed it!  LOL!!


 There was no actual Port here so the ship anchored off shore.  We were taken in on the ship's Tenders.


Some passengers took the opportunity to go swimming.  The water looked amazing .. so clear and clean.


 In line at the jetty waiting to get back on board.  We didn't stay long, only a few hours (because of the heat) but it was really interesting and very enjoyable.

Hope you enjoyed this little look at Lifou.  I will share more photos of our trip in the weeks to come.  Have to say I love Cruising and we will be doing it again.  Probably not back to the South Pacific but we would love to go back to New Zealand and also do a Cruise around Australia.  One day!!

Thank you so much for visiting  and do enjoy the rest of your day.
Take care, stay safe and God Bless.

Happiness isn't about getting what you want all the time. 
It's about loving what you have and being grateful for it.