Showing posts with label Mini album. Show all posts

Monday, 14 September 2020

Crafty Cardmakers Challenge #263 - Use a Recycled Element

 Hello dear friends and welcome.  So pleased you stopped by,

Judy is our Host for the new Challenge at Crafty Cardmakers, and the Theme is to use a Recycled Element in your project.   As always, you may create whatever you wish as long as it follows the Theme.  If it is not obvious, please tell us what it is that you have recycled.


For my project, I have created an album cover out of a recycled box.  

I actually started making this Album cover before I realised that we had a recycling Challenge coming up so, unfortunately, I didn't take any photos right at the very beginning.   I had already attached the spine to the front and back covers when it finally dawned on me that I could use this as my DT contribution.  Duh!!

As you can see, I used the box from our new electric toothbrush.  The covers measure 6" x 6" and the spine is 6" x  1.5".

To attach the spine piece to the covers, I used wet glue and a polyester fabric which is normally used as lining.  It is quite thin but also quite strong and works really well for book binding. 

Once the glue was dry, I attached double sided tape to the side that I wanted as the outside of my book.

 
I had to glue two sheets of tea stained paper together to make a piece large enough to fit.  If you look carefully, you can just see the join but it's not really noticeable IRL and it will be covered over when I embellish the cover anyway.
Turned the cover over again, lined it up in the center of the paper and then removed the backing on the double sided tape and glued it down.
I bevilled the corners and then attached double sided tape all around the edge so I could wrap the paper around the cover.

 I always wrap the long sides first.  Not really sure why, but I just prefer doing it that way.

Once the paper was wrapped around the edge, I added the binding strip ..
.. and then attached more tea stained paper to the inside covers.


This is still a work in progress.  I have completed a few pages but it still has some way to go before the album is finished.  

Now it is your turn.  If you pop over to the CCM Blog you will see lots of wonderful inspiration from the rest of the Team for your own recycled project.  Would love to see what you create.
 
Crafty Cardmakers Challenge #263 - Use a Recycled Element.
 
Thank you so much for your visit and enjoy the rest of your day!
 
Take care, stay safe and God Bless.
oxox  Marg


Wednesday, 26 August 2020

Use Your Stash Album - Design by JenofEve

 Hello everyone.  Hope you are all well and staying safe.

As promised in my last post, I'm back to share a mini album I created recently.  I didn't initially set out to create this for my Granddaughter but, when I did finally finish it, it was getting very close to her 18th Birthday and I thought it would come in handy for her to keep her celebration photos in.  So it became part of her present and, I'm glad to say, she loved it.

The papers I've used in this Album are, obviously, not from my Stash.  They are from the Darcelle A4 Paper Pad by Prima.  The template though, is a Use Your Stash Scrap Journal Design by JenofEve Designs.  Jen has a facebook group where she shares some of her amazing designs as freebies.  You just need to join the group to get access.  

Here's a little reminder of the cover.

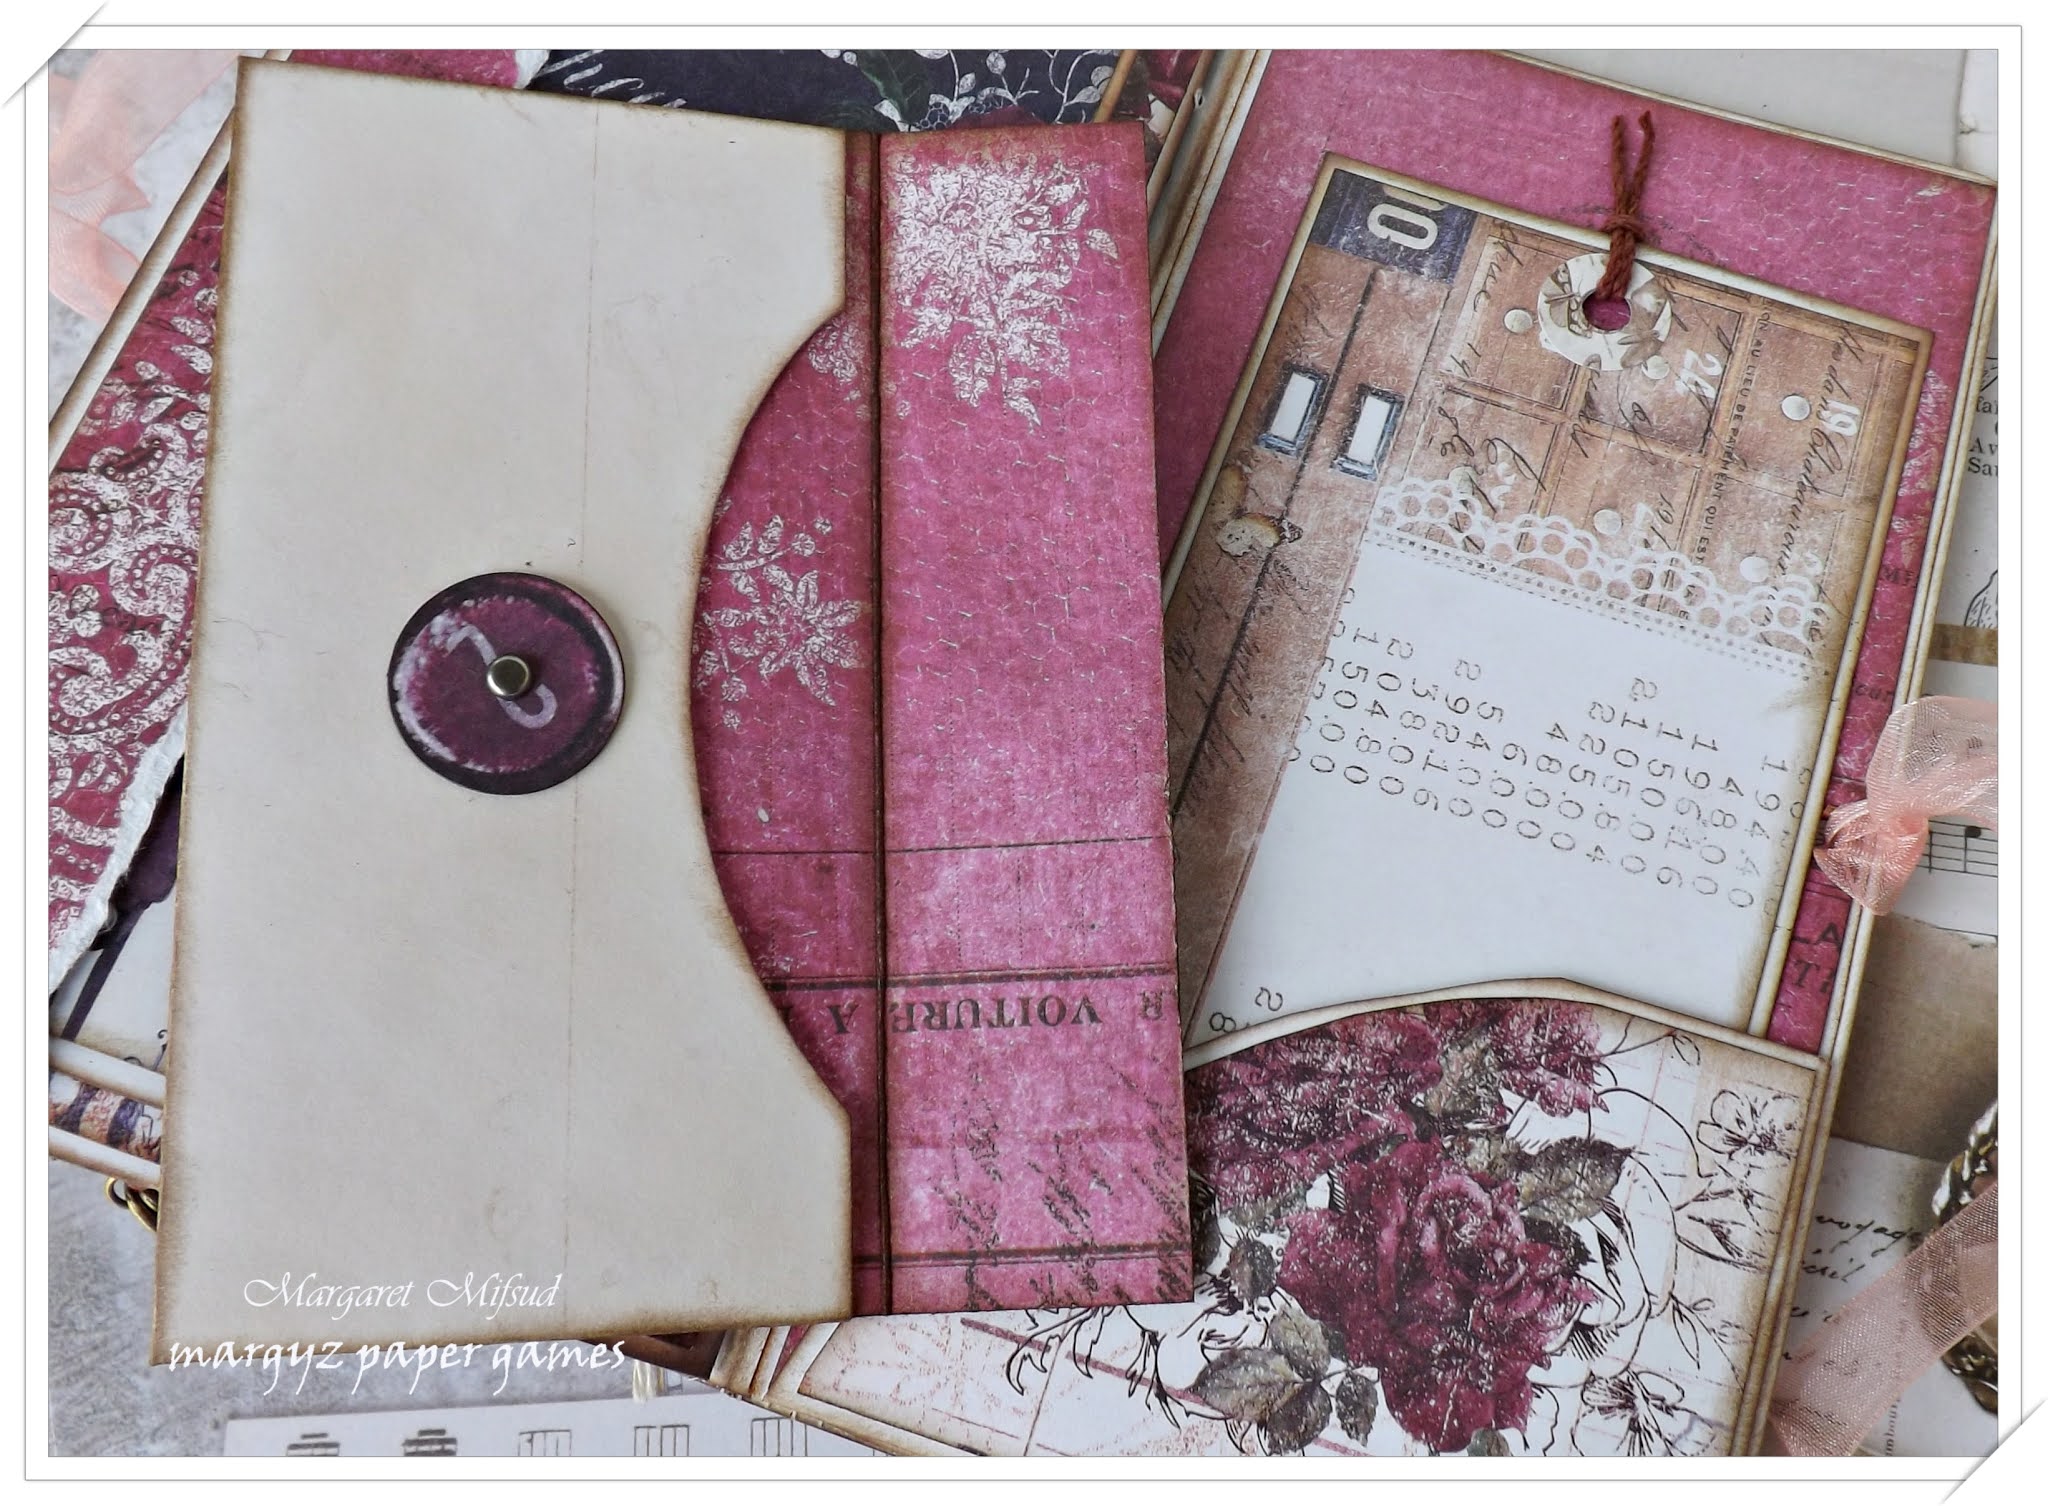
On the right is the inside front cover which has a pocket with a fussy cut edge and a couple of journaling card inserts.

There are basically two page sets sewn into this album.  Can't really call them signatures as they only have one set each so, the page on the right is the front of the first one and I've just added a simple altered paper clip as an embellishment.

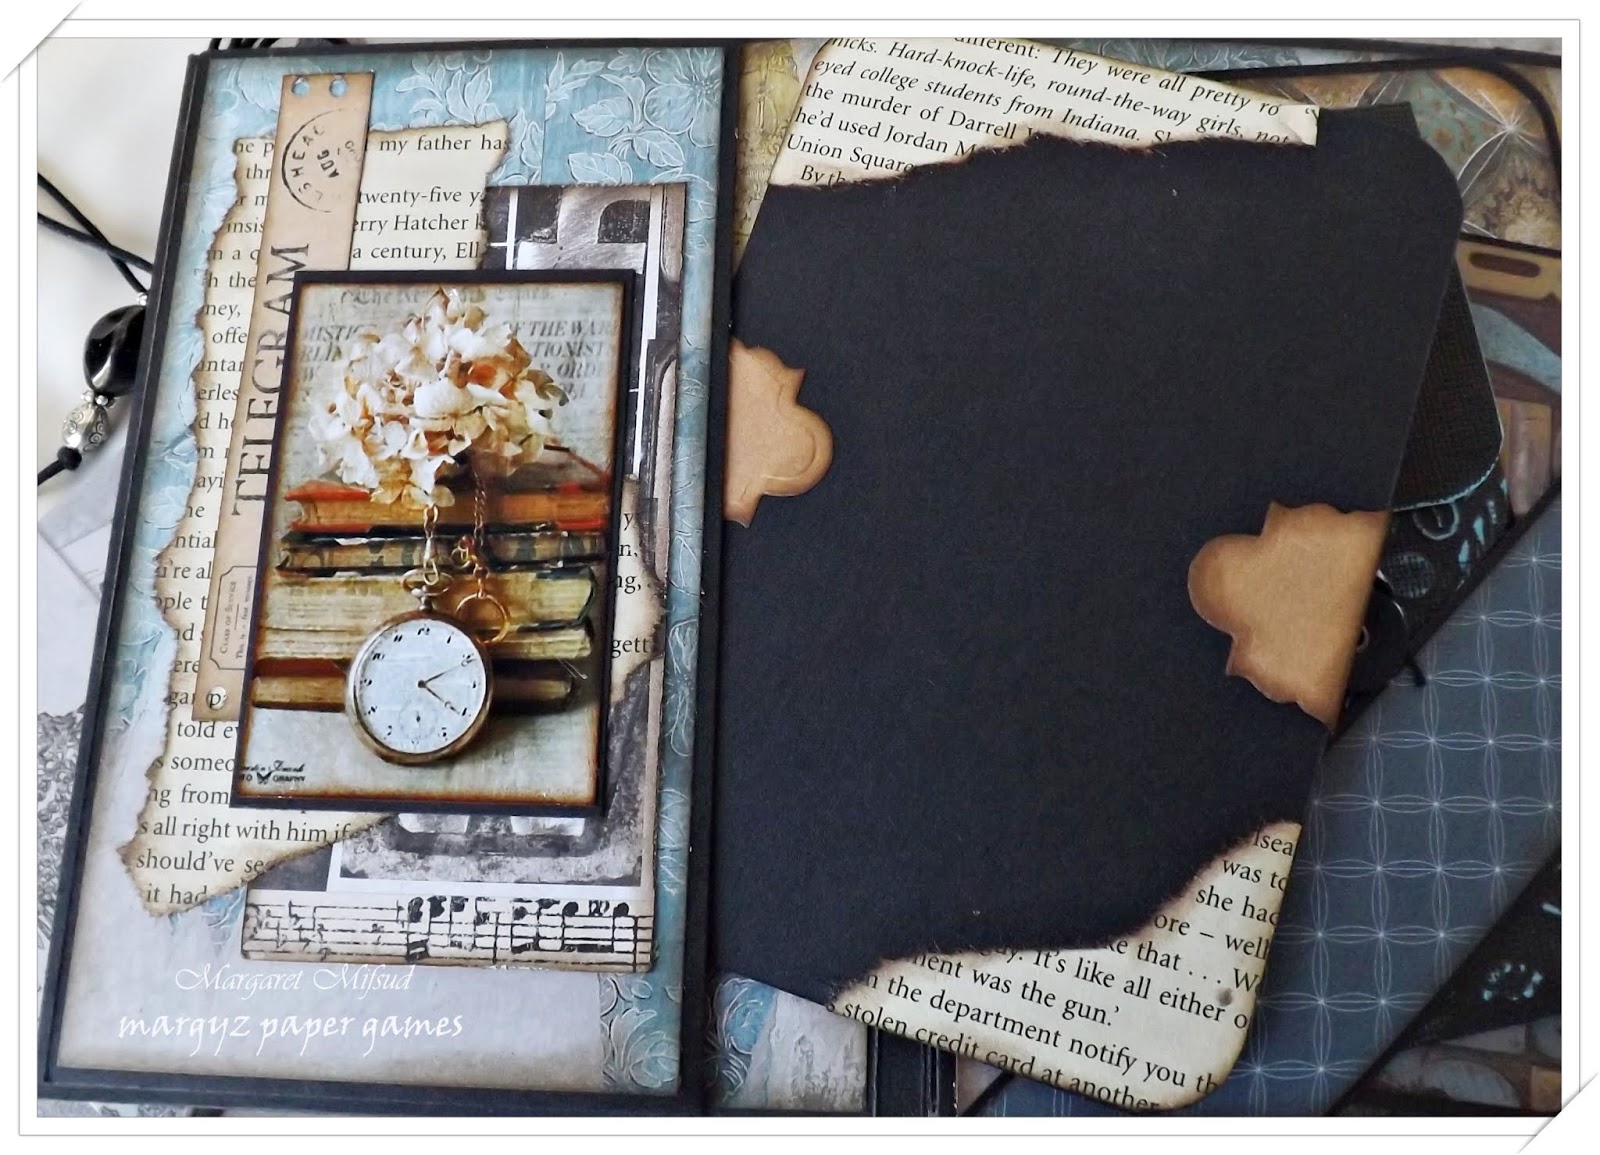
Turning the page, you are already in the middle of the signature but, as you can see, there is quite a bit going on here.
There is a flip page on the left and a small journal on the right.


The flip page opens up to a pocket with a journal card inside ..


.. and a small eyelet through which I've attached a tiny key as well as the small 'Love' tag.

 The journal was sewn into the album along with this page set and only has a few pages which could be used to write down her impressions and thoughts about turning 18 or anything else she may wish to remember.

I won't show you each page in the journal as they are basically the same but I did pop a small doily in the centre and finished off the twine with a couple of charms.

Underneath the journal is a small flip page ..

.. which could be used for photos or more journaling.


On the left is the back of the first page set and on the right is the front of the second. 

The small pocket on the right holds more journaling cards and, just in case you are wondering, the numbers have no significance, they are simply part of the papers.
Here is the inside of the second page set with a deconstructed envelope on the right hand side ..
.. and a cute little paper clip dangly thing (that's it's scientific name.. LOL) on the left.
The inside of the envelope is the centre of this set and, again, I have a ttached a couple of charms to the ends of the twine.  I have used magnets to keep the envelope closed so secret things could be kept inside.

Here is another small eyelet with some charms attached with twine.
The back of the deconstructed envelope ..

 .. and another paper clip dangly thing.
This is the back of the page set and the inside back cover, both of which have a pocket.
There is a journaling tag in the left pocket ..
.. and a cute little envelope and journal tag in the right pocket.
And, finally, the back of the album.

I thoroughly enjoyed creating this book.  The papers are really gorgeous and I was extremely happy with the design.  If you're interested, go check out Jenofeve on facebook or Youtube.   She actually has a video where she creates this booklet and talks about different design options.  I think she is amazingly talented.
 
Thank you so much for stopping by to take a peek and I do appreciate your comments.  Unfortunately I have had to modify all comments due to the amount of Spam that has come through lately.
 
Enjoy the rest of your day.
Take care, stay safe and God Bless.


Monday, 17 August 2020

Crafty Cardmakers Challenge #261 - Lots of Layers

Hi everyone!   Thank you for stopping by my blog today.  So happy to have you visit.  A very special welcome to my new followers.  Thank you for joining me on my creative journey.

So, the CCM Team are back from our break and it's time for a new Challenge.   Jo is our host for this one and the Theme is Lots of Layers.  As always, you can enter anything you like, a card, layout, off the page, whatever you wish  as long as it follows the Theme.

Over the last few months, I have been busy creating a couple of mini albums and, as the cover of this album has lots of layers, thought it would be perfect as my DT contribution for this Challenge.  I usually take my time creating my albums and only work on them in between other projects.  This little book was created for my Granddaughter who turned 18 just recently.  I am only showing the cover today and will share the book itself later on.

The papers used in this book are from the Darcelle A4 paper pad by Prima.  I love these papers, they look pretty here but are even better in real life. There's actually 5 layers of paper on this cover, the first of which is the main base mat.  It's mostly covered here but is very pretty.
You can see some book paper in between the dp and I added a cute little bow made with a new punch I purchased recently.  A little difficult to make as it is so small, but really sweet.
Added a small cluster of Little Birdie Flowers ..
.. and created a faux Polaroid frame which I edged with some gold embossing.
The closure on this album is a ribbon bow which was simply threaded through an eyelet on the front and back cover..

I do love how this turned out.  Hope you like it too.

For more inspiration, please pop over to the CCM blog and take a look at the fabulous creations by my Teamies.  Would love it if you joined in with the Challenge.

 
Thank you so much for your visit and the lovely comments as well.  I haven't done much crafting of late so I haven't posted as often and I also haven't done a lot of visiting either (I do apologise for that) so I'm especially grateful for your visits and comments.  I'm hoping things will get back to normal soon.
 
Take care and God Bless.
 
oxox  Marg
 

Tuesday, 12 May 2020

Envelope Mini Album #2

Hi everyone!  Welcome to my blog.
I hope you are all staying safe and well and are keeping yourselves busy while the world is in lock down.  Luckily for us in South Aus, our restrictions are starting to ease.  Hopefully people will continue to do the right thing and we will keep moving forward.

I wish to share a little envelope album I've created.  The design for this comes from  Dawn Meadows of The Book Vandal Shop (Here is the link to the video)  and is the same design as my previous envelope album (Here).  I have added a couple of small design changes but it is, basically, the same.

I must warn you that this is a huge post so, grab yourself a cuppa before you start and, hopefully, you will stick with me to the end.

The papers used are by Kaisercraft, from their 6.5" Antiquities paper pad and the finished size of the album is  6.75" x 4.5" x 0.75".
I didn't do much embellishing on the front.  Just a little flower cluster and a fancy book plate.  The closure is a simple wrap around with twine and I've just added a couple of beads to the ends.
 As in the previous album, this one opens both to the right and to the left.   This view from the top will show you what I mean.  As you can see, it's only a small album but you can fit quite a bit into it.
 So, when you open the book from the left (I'll show the other opening later in this post) it reveals a flip page and pocket on the left side and the front of the junk journal on the right side.
 There is photo collage decorating the front of the flip page and a large tag inside the pocket.
 On the back of the tag I just added a few pieces of torn book page leaving plenty of space for photos or for journaling.
 The flip page is one of the design changes I made to the original.  As you can see I've added another photo collage and then on the right is a small poem I found on the net about books.  I love to read and so this really hits the right spot for me.  I love this little poem.  You'll notice that the photos I have added to this album are all about books so, I guess, this will be my Book Book.  LOL!!
 On the right side of the page is the small Junk Journal and this is the other design change.   In the previous album, the Journal was actually sewn into the album but, I wanted to be able to remove this one so the back cover simply slips into the pocket.
 Added to the pocket is another bookish photo collage.
 I won't show you the whole Junk Journal as this post will be way too long already, but I will just show a few of the pages.
 I've added stenciling and torn bits of book pages and washi tape ..
 .. a little touch of lace, an envelope and some printed pages.
 Altered some paper clips to add the flowers ..
 .. and added a few word strips as well.
 Here you can see how it just slips in, and out, of the pocket ..
.. and this is how I finished off the twine after sewing the signatures together.
So this is the page that opens the other way.  There is another flip page and pocket on the left and a diagonal belly band on the right.
Another full size tag inside the pocket ..
.. with the back left practically bare apart from the torn bits of book page.
Can you see my faux pas?   I placed the tab on the wrong side!!  Duh!!  So,  instead of making a whole new tag, I simply added another tab to the correct side.
Open the flip page to reveal another photo collage and another book poem.  This poem is brilliant.  When I read, I totally lose myself in the story and this poem says it all!!  Love it!!
Under the belly band there is a little envelope which holds a bookmark, (are you surprised??  LOL!!) and a couple of tags as well.
I have shown the envelope before in another post so, if you are interested, you will find it HERE.
The back of the album was left plain.
I thoroughly enjoyed creating this booklet and I really love how it turned out.  I hope you have enjoyed seeing it.  I do have two more books on the go at the moment.  They are quite different from this album and I hope to be sharing them in the next few weeks. 


Am entering this into the Mini Album Makers Challenge for May.


Thank you so much for your visit and any comment you may care to leave.  I would love to know what you think.

Take care, stay safe and God Bless.