Showing posts with label Mini Album Makers Challenge Blog. Show all posts

Tuesday, 12 May 2020

Envelope Mini Album #2

Hi everyone!  Welcome to my blog.
I hope you are all staying safe and well and are keeping yourselves busy while the world is in lock down.  Luckily for us in South Aus, our restrictions are starting to ease.  Hopefully people will continue to do the right thing and we will keep moving forward.

I wish to share a little envelope album I've created.  The design for this comes from  Dawn Meadows of The Book Vandal Shop (Here is the link to the video)  and is the same design as my previous envelope album (Here).  I have added a couple of small design changes but it is, basically, the same.

I must warn you that this is a huge post so, grab yourself a cuppa before you start and, hopefully, you will stick with me to the end.

The papers used are by Kaisercraft, from their 6.5" Antiquities paper pad and the finished size of the album is  6.75" x 4.5" x 0.75".
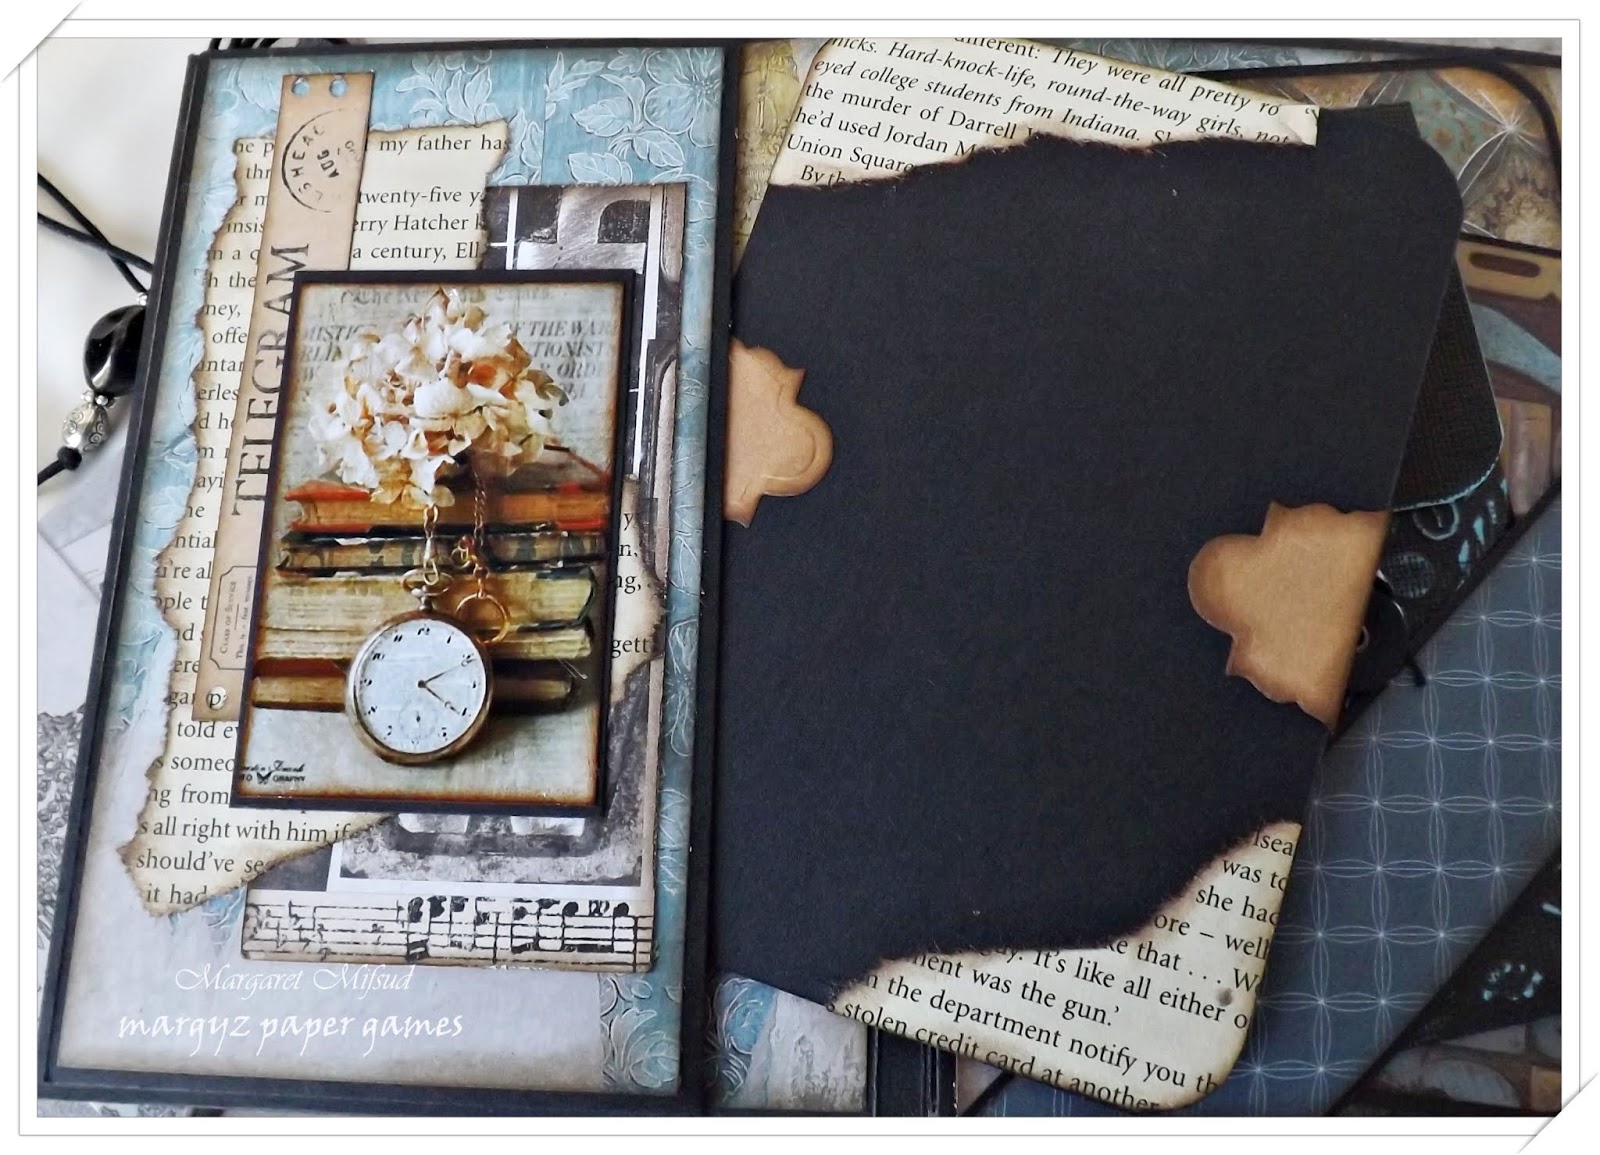
I didn't do much embellishing on the front.  Just a little flower cluster and a fancy book plate.  The closure is a simple wrap around with twine and I've just added a couple of beads to the ends.
 As in the previous album, this one opens both to the right and to the left.   This view from the top will show you what I mean.  As you can see, it's only a small album but you can fit quite a bit into it.
 So, when you open the book from the left (I'll show the other opening later in this post) it reveals a flip page and pocket on the left side and the front of the junk journal on the right side.
 There is photo collage decorating the front of the flip page and a large tag inside the pocket.
 On the back of the tag I just added a few pieces of torn book page leaving plenty of space for photos or for journaling.
 The flip page is one of the design changes I made to the original.  As you can see I've added another photo collage and then on the right is a small poem I found on the net about books.  I love to read and so this really hits the right spot for me.  I love this little poem.  You'll notice that the photos I have added to this album are all about books so, I guess, this will be my Book Book.  LOL!!
 On the right side of the page is the small Junk Journal and this is the other design change.   In the previous album, the Journal was actually sewn into the album but, I wanted to be able to remove this one so the back cover simply slips into the pocket.
 Added to the pocket is another bookish photo collage.
 I won't show you the whole Junk Journal as this post will be way too long already, but I will just show a few of the pages.
 I've added stenciling and torn bits of book pages and washi tape ..
 .. a little touch of lace, an envelope and some printed pages.
 Altered some paper clips to add the flowers ..
 .. and added a few word strips as well.
 Here you can see how it just slips in, and out, of the pocket ..
.. and this is how I finished off the twine after sewing the signatures together.
So this is the page that opens the other way.  There is another flip page and pocket on the left and a diagonal belly band on the right.
Another full size tag inside the pocket ..
.. with the back left practically bare apart from the torn bits of book page.
Can you see my faux pas?   I placed the tab on the wrong side!!  Duh!!  So,  instead of making a whole new tag, I simply added another tab to the correct side.
Open the flip page to reveal another photo collage and another book poem.  This poem is brilliant.  When I read, I totally lose myself in the story and this poem says it all!!  Love it!!
Under the belly band there is a little envelope which holds a bookmark, (are you surprised??  LOL!!) and a couple of tags as well.
I have shown the envelope before in another post so, if you are interested, you will find it HERE.
The back of the album was left plain.
I thoroughly enjoyed creating this booklet and I really love how it turned out.  I hope you have enjoyed seeing it.  I do have two more books on the go at the moment.  They are quite different from this album and I hope to be sharing them in the next few weeks. 


Am entering this into the Mini Album Makers Challenge for May.


Thank you so much for your visit and any comment you may care to leave.  I would love to know what you think.

Take care, stay safe and God Bless.

Monday, 5 November 2018

Masculine Flip Fold Album

Hello everyone.  Welcome to my crafty place.
Hope you are having a wonderful day.

I'm here to share with you the Masculine Mini Album I created for my Guest Design spot over at Mini Album Makers Challenge blog.  I had been wanting to create a masculine style mini album for a while and thought that this would be the perfect project for this post.
On the MAMC post, I shared the first half of the album and also shared how it was created.  In this post, I will show you the completed Album.  If you'd like to see the tutorial as well, HERE is the link.
This will be quite a long post so you might want to grab yourself a cuppa.
The outside of this album measures 5.5 x 6.5" and the inside pages are 4.5" x 6".  The spine is 2" wide.
The papers I've used are a mix from Studio Light's Industrial 2.0 paper pad and Kaisercraft's Factory 42 paper pad.
 The inside cover and the first page set.
I haven't done much embellishing in this album but I have added  a few cogs here and there and a little bit of washi tape as well.  I have also stamped some splatters and coffee stains, added a little stenciling and inked the edges of all the papers with Ground Espresso Distress Ink.
I created two sets each in two different styles of  pages.  So, there are 4 page sets in this book but, as you will see, there are a lot of places for photos, etc.
This page set opens up firstly to the left as seen above ..
.. and then the page on the right lifts up to reveal a folded card ..
 .. which is tucked into a side opening pocket attached at the back.
You may notice that I've added a few of Tim Holtz's Snarky Small Talk Stickers to this book.  If you'd like to see them properly, simply click on the pictures to get a larger view.
This is the back page of the first set and the first page of the second.
I have used a stacked hinge to bind my pages to the spine and have left a gap of about .25" in between each set so that the pages will sit nice and flat when opened.
The back page of the first set has a double belly band which is held down by some magnets ..
.. and opens up to reveal another photo mat.  All of the above mats and pages are attached to, and held by, a single hinge.
The second page set opens out to the right, and there is another underneath which opens out to the left.  It also has a folded card tucked into a pocket which is attached at the back of the set but this pocket is open at the top..


The back of the second set and first page of the next.
   This little flip up opens to reveal a double photo mat (or journaling spot).
The next two page sets are the same design as the first two but, of course, I have used different papers (from the same paper pads) to decorate.


The little flip up here is the same as the one from the second page set but I have changed it a little in that it opens up first and then flips up.  The first one flips up first and then opens.  I'd like to say that it was deliberate but I didn't realise that I actually put the papers on the wrong sides .. LOL!!
I can actually still flip it the right way but I wanted the dark grey papers showing on the outside of it as it is a nice contrast to the papers underneath.

The cover is made of chipboard.  As you can see I used a piece of hessian style material to cover the spine and, although the material is glued down, I added the brads for some extra interest and strength.  After all, this is a man's book and is going to get some rough handling!  LOL!!
I used a piece of corrugated board under a chippie frame by Little Birdie and a word strip by Scrapmats, to decorate the front of the book.  The frame was heat embossed with a mix of black and bronze embossing powder and the word strip was edged with Ground Espresso Distress Ink.
The chippie decorating the spine is also by Little Birdie and was heat embossed similarly to the frame on the front.

This book is fairly plain but I really enjoyed working it all out and creating it.  Between this book and the Junk Journal I created a while ago (you can see that here) I rediscovered my love for making books and I am itching to go and make another.  Hopefully, soon.

Sorry that this is such a long post but I hope you managed to stick it out to the end and that you enjoyed seeing my little album.  If you need some inspiration for your own Album making, pop on over and pay a visit to the Mini Album Makers Challenge blog.  The DT ladies create the most amazing books and I'm sure you will find plenty of inspo there and, if you enter the Challenge, you will have the chance of doing a Guest spot as I did.

Happy album crafting everyone!
Take care and God Bless