Showing posts with label metal trinkets. Show all posts

Monday, 6 February 2017

ManLy Layers!

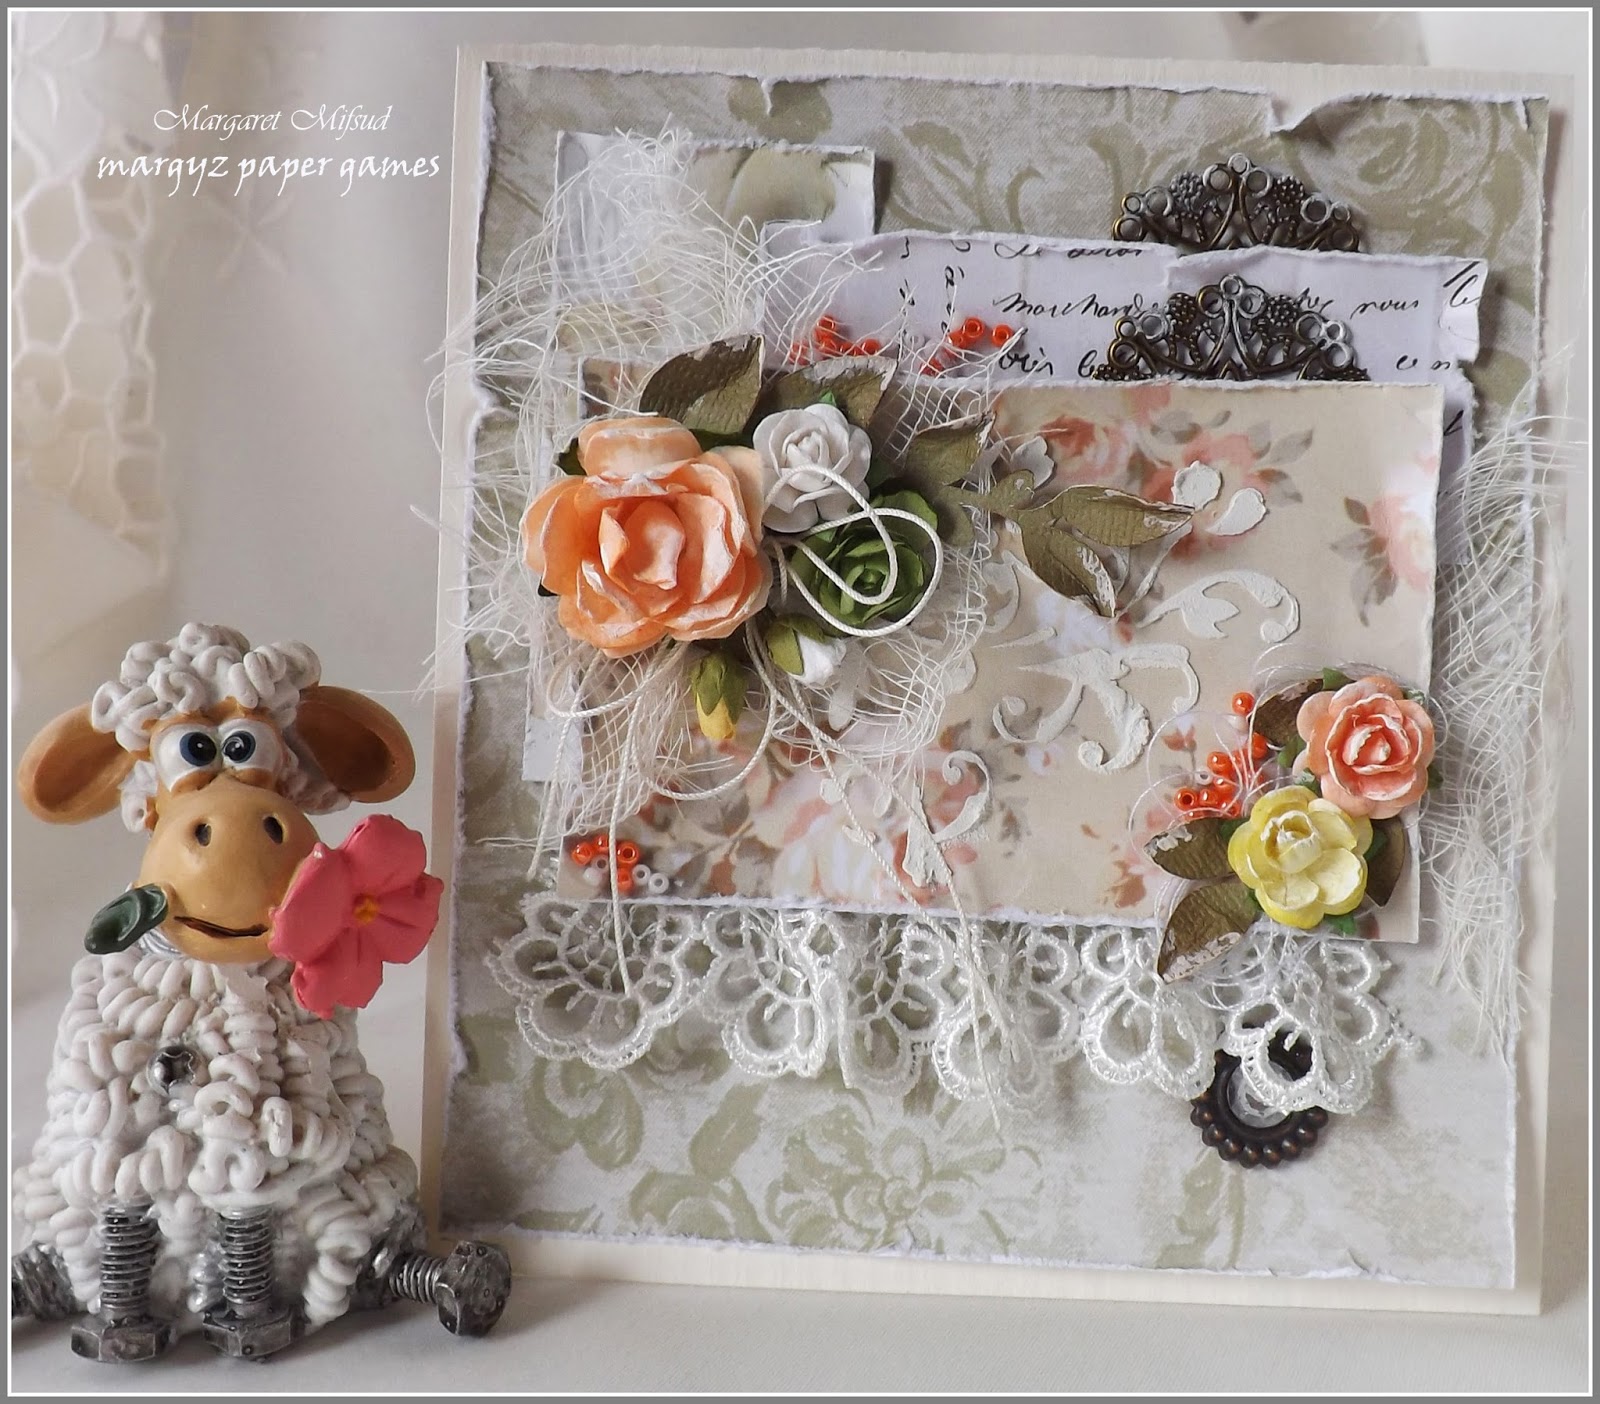
Hello everyone and welcome to my blog.  
A very special welcome to my new followers .. thank you so much for joining me on my crafty journey.

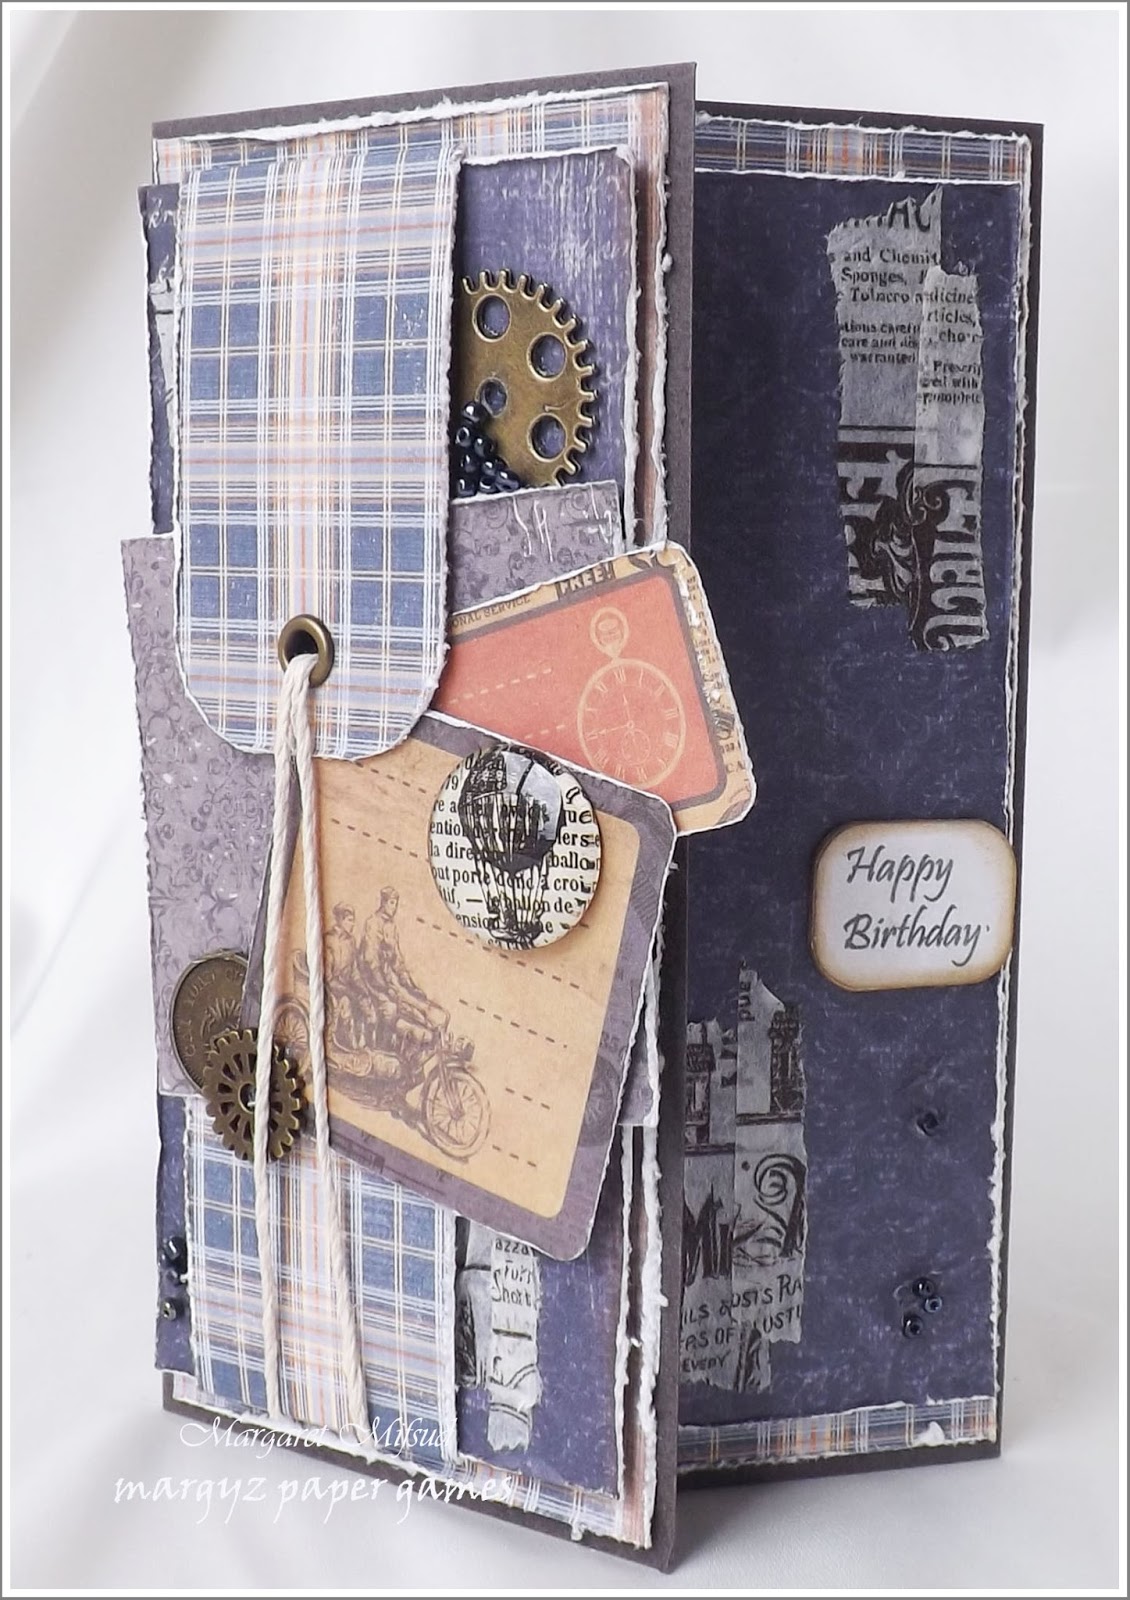
I am sharing another 'man' card with you today.  A double fold card .. my fave design at the moment.  The papers are from Maja with just a couple of labels thrown in from Kaisercraft.


 I really love that tartan paper and am so glad I found a place to use it.  The idea for the tag tied down with twine was found somewhere on the net but, as usually happens, when I wanted to take another look, I couldn't find it anywhere.  Forgot to pin it didn't I???  Duh!! 

Needed a focal image for the front and these Kaiser labels were perfect.  They are from the Sear's & Son 6 x 6 Paper Pad.  The imitation coin and the cog have been in my stash for ages so, no idea where they came from.  Same with the flair.  Have had it for ages too and finally found somewhere to use it.

Printed the 'Happy Birthday' with the computer and simply mounted it on some chipboard and then edged it with Distress Ink.


Added a few seedbeads here and there for some extra interest ..

.. as well as some washi tape.


More of that lovely tartan paper on the inside, and a little washi tape, just because!  The center section is left blank so I can add a personal message.

While photographing this card I discovered the washi tape was coming loose in a few places ..tch!  always something isn't there!!??!!  LOL!!   Popped a bit of glue underneath to fix it.  Just glad I noticed before it was given away.

Thank you so much for stopping by and do enjoy the rest of your day.
 Take care and God Bless.


Tuesday, 20 September 2016

Girls' Day Out Folios # 2

Hello again everyone and welcome to my blog.  So happy to have you visit and hope you are having a fabulous day!

In a previous post I explained about a fabulous day out I had recently with some wonderful scrapping friends of mine .. Adriana Bolzon, Astrid Maclean, Heather Jacob and Helen Wallace.    We all exchanged handmade gifts on the day.  I shared the gifts I received in this post HERE and the first of the photo folios I made HERE and now I would like to share the second of my folios.  This one was made for Astrid Maclean.


The papers used are from Kaisercraft's Heirloom 6.5 x6.5 Paper Pad.


The design is similar to the Tim Holtz Collection Folios but my version is smaller.  The outside measurement is 6.75" x 5". 


 As in the first folio I shared, I only added some stamping, stenciling, washi tape and a few chipboard pieces from Scrapmatts.
The pocket on the inside front cover holds a photo mat ..
 

.. and the first page is a pocket that holds a small folded card ..


.. which was ideal for all of us to write a personal message.  The paper on the inside of the card is from Prima.


Next are two small half pockets ..


.. each holds a journaling card which, I thought, would be ideal for recording the details of the day.


The next page is a full sized pocket.  The flap is held down with a magnet ..

 
.. and there is another photo mat inside.


The last page folds out ..


.. once ..


.. twice, so there is plenty of room on both sides for photos.


The last page ..


 .. and the back cover.


Not much in the way of embellishment in these booklets as I feel it is much easier to add them after the photos are in and, besides, the ladies know what they themselves prefer and can decide whether they want to embellish, or not.

So, this was the second of my folios.  I will share the other in the next week or so and then, hopefully, soon after that I will share the final ones and the step by step instructions.  Hope you will return to take a look.

Thank you so much for dropping by and, if you would like to take a look at the work done by these fabulous ladies here, in alphabetical order, are the links.

Adriana Bolzon - AB Inspirations
Astrid Maclean - Astrid's Artistic Efforts
Heather Jacob - Art and Life
Helen Wallace - Textures and Tales

Hope you enjoy the rest of your day.
Take care and God Bless.

Monday, 28 March 2016

Man Card - Clean and Simple

Hello everyone!  
A very warm welcome to my blog ... so glad you dropped by.
Hope the weather in your part of the world is treating you kindly.  It's actually been quite cool here in Adelaide today, which is wonderful, but they tell me it's going to warm up again.  Just hope it doesn't get too hot.  Hate the heat!!

Anyways, I am back to share another masculine card with you.  This one was made for a close friend.  As the post title suggests, this one is actually quite clean and simple.  Well, for me anyway.  LOL!!

Here 'tis


The papers used are from 7Dots Studio and are part of a give-away I won from Helen Tilbury at 
Not a lot of layers, and not much grunge happening here.

I did splash a bit of black ink around  and added some washi tape.  I also 'rusted' up the little metal cogs a bit as you can see.

Haven't used an embossing folder in an age so I decided to drag one out for this card and I did ink the raised areas with some VersaColor stamp pads.
   
Heat embossed the greeting, mounted it on some cardstock and then simply attached it to the card with some bits of twine.


Just decorated the inside with some border punched strips of paper.  The bottom section is a pocket ...

...  which is used to hold the verse.  My personal message was written on the other side.


And that's it, all done and dusted!!  As I said, it is a bit cleaner and simpler than I usually do but my grungy mojo has gone west.  Besides, I thoroughly enjoyed making this card and think I will be doing more of the simpler ones.  I also want to try some watercolour cards and have been haunting You Tube for ideas and techniques.  Have been hopeless in the past with watercolour but I'm going to keep trying and, hopefully, will be able to get it done!!  One can dream, can't one??  LOL!!

Thank you so much for dropping by and do enjoy the rest of your day.

Take care and God Bless.

Thursday, 3 September 2015

A Card for a Friend

Hello my lovely visitors and welcome to my blog and a very warm welcome too to my new followers.  So pleased you decided to tag along on my creative journey.  Thank you.
I hope everyone is having a lovely day.  It's supposed to be Spring here in Adelaide but it's
cold and wet and miserable!!  Can't even take the dogs for a walk .. don't like it!! 

So, now that I've had my little gripe, I'd like to share a card with you.  It's been a while since I posted and I had actually forgotten about this one as it was made for a friend and I couldn't show it until it had been received.  Was reminded about it when she showed it on facebook .. forget my head if it wasn't screwed on .. LOL!!


This is another instance where, I made a tag, and then simply attached it to folded cardstock and turned it into a card.   I also seem to be stuck in a loop with the colours but I love this combination .. light and fresh and very 'Spring' (wishful thinking)!


The papers are from Megs Garden's 'English Rose Garden' Mini Paper Pack.  As you can see, I used three layers and attached a strip of dry wall tape on one side.  I also tucked some strips of lace in between the layers.  The seam binding was coloured with watered down acrylic paint.


The roses are the 'Puffy Paper Flowers', also from Megs Garden (and my fave flower) which have been sprayed with watered down acrylic paint. 


Added a stamen cluster, twine and strips of gauze to my cluster and also scattered some seed beads around.


A closer look at the metal trinket.


The inside with a pocket on the right hand side for a little note.


I dry-brushed the flowers and the trinket with gesso and my card was done!  Hope you like it!!  My friend did .. she said so on facebook .. thanks Linda!!

Well, as they say in the cartoons, 'That's all folks'!!  For now anyway .. he!he!

Thank you all so much for paying me a visit and do enjoy the rest of your day. 


Take care and God Bless.

Friday, 24 July 2015

'English Rose Garden' - Cards for Megs Garden

Hi everyone and a very warm welcome to my bloggy space and a very special welcome to my new followers.  Thank you so much for joining me.  Hope you are all having a wonderful day. 

I'm back again to share my projects for the Megs Garden DT.  This time I have created two more cards with the lovely 'English Rose Garden' papers.  I think I mentioned in a previous post how much I love these papers.. they are so pretty and simply perfect for anything 'shabby chic'.

It is winter here in Australia and it has been bitterly cold and wet and I, for one, have certainly had enough of this weather.  I made these cards with some lovely summery colours just to brighten up the day a bit.


Megs Garden Products used

Papers
http://megsgarden.com/contents/en-us/d728.html
English Rose Garden Mini Paper Pack

Flowers


http://megsgarden.com/contents/en-us/d9.html


Lace
http://megsgarden.com/contents/en-us/d676_Lace.html


For the base paper I've used 'Leaves &Foliage' and then added some scraps from 'Bouquet of Roses' and 'Roses & Flowers'  plus a small scrap taken from the Butterfly Book Kit to add a little contrast.


I added a little texture with a Prima Damask Stencil and some paste and cut a small metal trinket in half and inserted it in between the paper layers.


The 'Puffy Paper Flower' (one of my favourite flowers to use) was coloured with acrylic paint.  I usually buy my flowers white and then mix my own colours of acrylic paint to get the shades I need.  Place them in a spray bottle, fill it up with water and the paint will spray quite easily.  I used the same method to colour the small paper roses.


The gorgeous lace was attached with a glue gun.  I simply gathered it slightly as I was glueing it down.


Used a couple of strips from the 'Pink Rose Vine' paper to decorate the inside of the card.  The left side was edged with Martha Stewart's Floral Vine Deep Etch Border Punch.


Added some seed beads, some twine made into a bow, some pieces of gauze and even a twist of cotton thread in and around my flower clusters.  Once everything was assembled, I dry brushed some gesso in random places to create some highlights.

So, that was card number one, and this is card number two ..


Megs Garden Products used

 Papers
http://megsgarden.com/contents/en-us/d728.html
English Rose Garden Mini Paper Pack

Flowers
http://megsgarden.com/contents/en-us/d594.html


Tim Holtz Studio Keyholes
http://megsgarden.com/contents/en-us/d429.html

For this card I used two pieces from the 'Roses & Flowers' sheet.  Cut them to size and distressed the edges with a distressing tool. 


My fave flower again .. the pretty 'Puffy Paper Flower' sprayed the same as on my previous card.


This bloom is the 'Ivory Primula'.  It is a lovely creamy white fabric flower which has been altered using watered down 'Peeled Paint' Distress Paint. 


Megs Garden also sells some Tim Holtz products.  This is one of the 'Keyholes'.  I simply glued it down and swiped it with a little gesso. 
 

The seam binding was sprayed with the same colour as the Primula then crumpled up and dried.  Wrapped it around the top paper layer and simply tied it in a bow.


Added some gauze in between the paper layers, some seed beads in a few spots and some strands of twine to the cluster.  Swiped some gesso in random places and my card was done!!   Adding these little touches just adds so much interest to a card .. well, I think so anyway .. LOL!!

If you wish to take a closer look at the products used here simply click on the product pictures and it will take you to the web page.  Also, why not go over and take a look at the wonderful projects created by my Team mates .. I know you will be inspired.  HERE is the link.

I hope I have inspired you as well.  Thank you so much for visiting and do enjoy the rest of your day.
Take care and God Bless.

http://megsgardenblog.blogspot.com.au/

oxox Marg