Hello my dear friends!
Welcome, and thank you for stopping by my blog today.
I am on a very specific creative journey at the moment. I am in the process of making some Junk Journals. Yes, I do realise it's not terrible momentous but, for me, it has become quite a Journey! I have been working on these for some months now. 'What??' You say!! .. 'Why is it taking so long??' Well, firstly, I only work on them once in a while and secondly, I keep changing my mind about things I've done previously. Consequently it is becoming quite a saga!! LOL!! But, I must say, it is a saga I am thoroughly enjoying!!
If you missed Part 1 of this Journey, and you'd like to take a peek, HERE is the link.
In that first Post I mentioned that I would show a few of the envelopes I had made in more detail and might also share how I altered my paper clips and, as a few people showed interest, I am here to show you exactly that. So, here goes!!
Firstly, the envelopes.
 In my stash I found some paper that I had already diecut with a Tim Holtz MM die.
 It wasn't a very big piece and I don't actually remember what I had intended to use it for so, after thinking about it, I decided I would create the front of an envelope with it.
 So I cut a piece of card for the back and then created the pocket and the flap with the diecut paper. Really love how it turned out.
 Used it to hold some journaling cards.

If you missed Part 1 of this Journey, and you'd like to take a peek, HERE is the link.
In that first Post I mentioned that I would show a few of the envelopes I had made in more detail and might also share how I altered my paper clips and, as a few people showed interest, I am here to show you exactly that. So, here goes!!
Firstly, the envelopes.


This second envelope was created for the other Journal I am doing. For this book, I wanted a couple of larger envelopes, but I wanted them to be a stand alone feature. I didn't want them attached to another page.
 I used two of my tea stained papers and created a double ended envelope ..
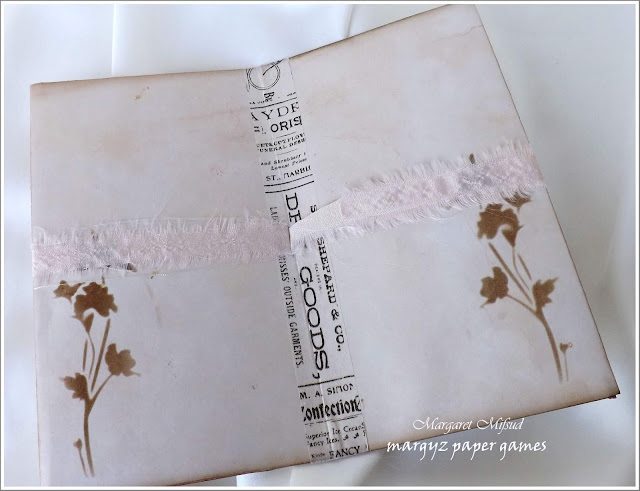 .. and added it to my paper stack. To add the ribbon closure, I simply cut a small slit in the centre and inserted two strips of torn fabric and also added a strip of washi tape to the fold for some extra strength.
Here's how it looks in the book ..

 .. and here it is open and ready for some journaling cards or memorabillia.

Now, onto the paper clips.
Firstly, you need to cut some paper or cardstock to create the base to attach your clips to. You will need two for each clip. I decided to use paper because I found cardstock was a bit bulky but you can use whatever you like. Also, it doesn't have to be circles. They can be any shape you like. I found it easier to simply punch out the circles for my clips.
 Then you simply slide one of the paper shapes onto your paper clips. Make sure the shortest part of the clip sits on the wrong side of the paper and that you slide it over far enough so that the end of the clip sits close to the edge. The long side of your clip needs to be left free so the assembly can slide over the edge of your page.
 On the side with the short end of the clip, add glue to the paper making sure you cover the clip as well and then attach the corresponding paper piece over the top, wrong sides of the paper together. I used my hot glue gun but you can use any glue as long as it's fairly strong.
This becomes the base for your embellishments.

 That's it!! That's all there is to it!!
With this base you can build up any kind of small collage with which to decorate your page and it also becomes a tuck spot for tags, etc.
Here are a few of the ones I have made.
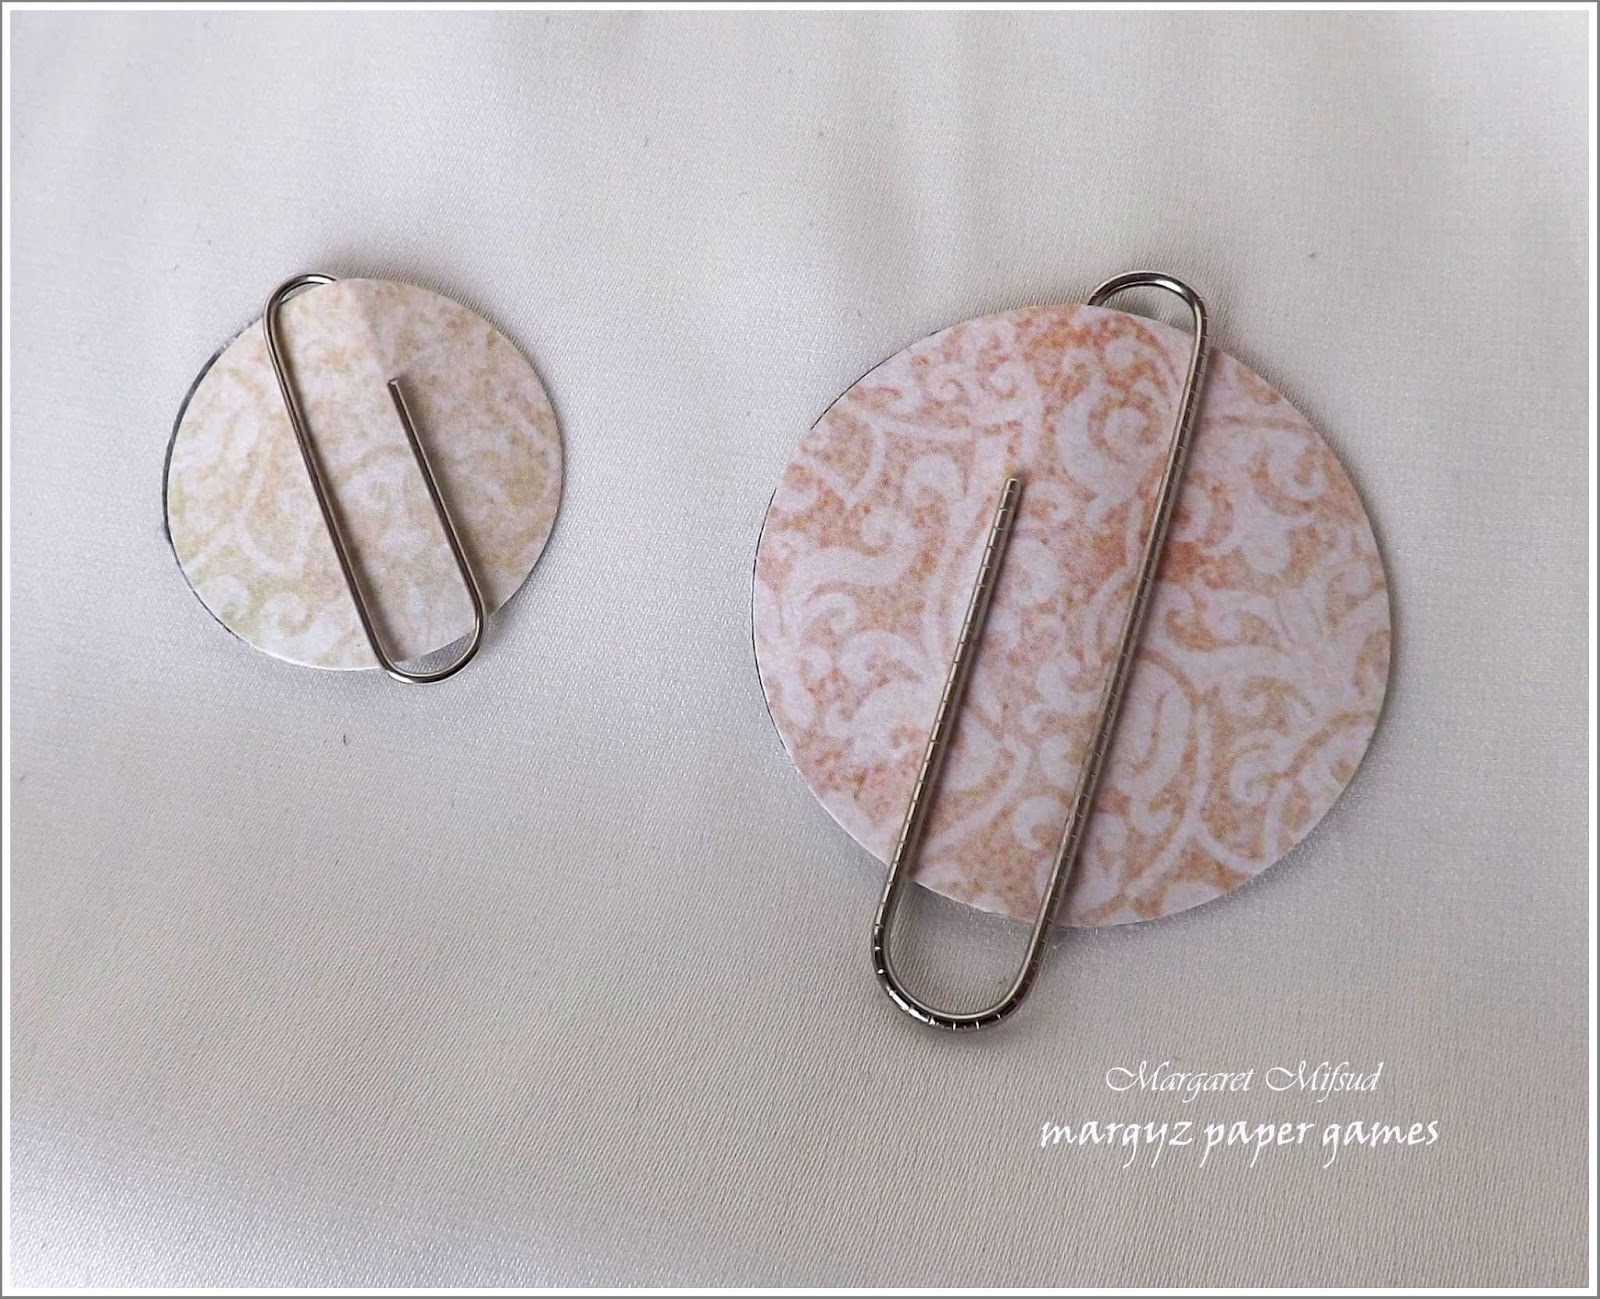
 This is the back. I found you can really use any size paper clip and any size paper shape for small or larger embellies. It really doesn't matter all that much. Both will hold onto the page but, when I want to make larger, heavier ones, I do prefer to make the base a bit bigger.

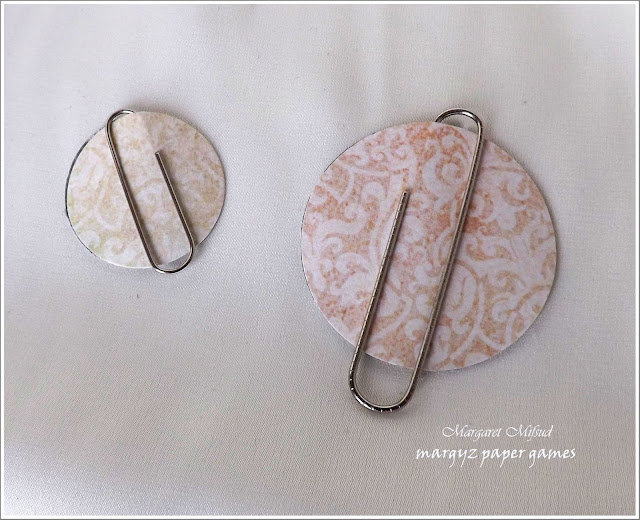
 Below, you can see that I used a smaller circle for one of my larger pieces. It works alright but I would have been happier if I had used a bigger base.
Because I added small bits of lace around the edge, it does looks a little untidy. I could have covered it with some pretty paper but didn't bother because, once you slide it onto your page, you don't see it anyway.
 Here is how they look once they are in a book.


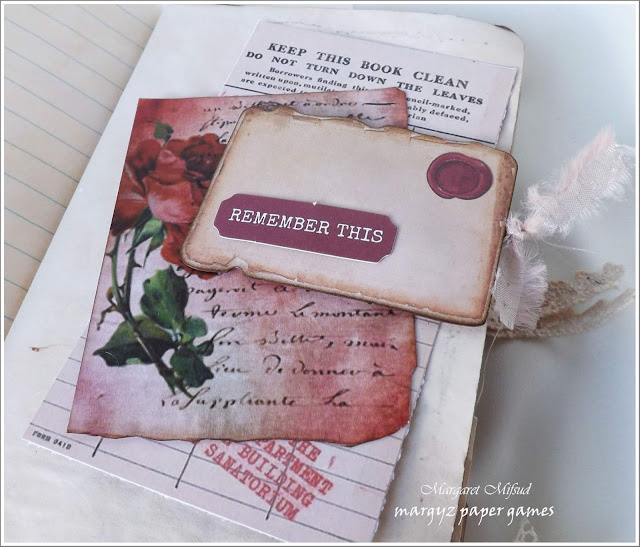
 Here's a very simple one with some tags tucked in underneath. I've also attached a small piece of ribbon through the end of the clip as well. Just for a bit of extra shabby chic decoration!
It really is a very simple process and I hope I haven't made it confusing. I really enjoy making these. Easy peasy and a lot of fun!! Have made quite a few more of them too! LOL!!
Thank you so much for visiting. I hope I have given you some inspiration and that you will come back to see more about my Junk Journal Journey!!
Have yourselves a lovely day!!
Take care and God Bless.


Here's how it looks in the book ..


Firstly, you need to cut some paper or cardstock to create the base to attach your clips to. You will need two for each clip. I decided to use paper because I found cardstock was a bit bulky but you can use whatever you like. Also, it doesn't have to be circles. They can be any shape you like. I found it easier to simply punch out the circles for my clips.


This becomes the base for your embellishments.

And, of course, this is the side that slides onto your page.
With this base you can build up any kind of small collage with which to decorate your page and it also becomes a tuck spot for tags, etc.
Here are a few of the ones I have made.


Because I added small bits of lace around the edge, it does looks a little untidy. I could have covered it with some pretty paper but didn't bother because, once you slide it onto your page, you don't see it anyway.


It really is a very simple process and I hope I haven't made it confusing. I really enjoy making these. Easy peasy and a lot of fun!! Have made quite a few more of them too! LOL!!
Thank you so much for visiting. I hope I have given you some inspiration and that you will come back to see more about my Junk Journal Journey!!
Have yourselves a lovely day!!
Take care and God Bless.

Oh Marg, you create as much as you like when you like.. doesn't matter how long it takes to create in your junk journals... which are all so amazing by the way.. thanks for your step by step for the paper clip embellishments, they look great. and I guess one is only limited by their imagination anyway.. over cast here today but now much rain.. hope you have a great weekend!
ReplyDeleteYou know..anything creative is food for the soul and even tho its a junk journal..you put your heart into it. So yes...the result is just beautiful and I am sure you will find a use for it.
ReplyDeleteBeautiful work and you are putting some seeds of inspiration out there for me! 😀
Having recently made a junk journal over a few days I think you made the right decision to do it over a longer period of time, as it allows for you to change your mind - something I wish I had done! The envelopes are beautiful and I absolutely adore the way you did the paper clips - I am definitely going to try that idea out - they are stunning!! Hugs, Anne xx
ReplyDeleteAbsolutely perfect Margy, doesn’t matter how long it takes you, as long as you are enjoying the process that it what counts! I just love it! Have a lovely weekend xx
ReplyDeleteWow, these are all so beautiful!! I love the envelopes!! The paper clips are so clever, too!! Your journal is going to be so amazing!! What gorgeous inspiration!! Have a great weekend!! Big hugs :)
ReplyDeleteLisa
A Mermaid's Crafts
Chiming in with the others here Margaret; it doesn't matter how long it takes, or how many times you change your mind, as long is your inner child is happy in her playroom, all is right with the world. I mostly leave a layout sitting on the table for a few days before I photograph it, as other ideas pop into my mind and I have the urge to "fiddle". Thanks for explaining about your little paper clip embellies - they are divine. I especially like the tiny floral postage stamped edge ones, but they are all gorgeous. Have a good week and keep warm.
ReplyDeleteOh Marg, I am working on a junk journal myself right now and I know just how long it takes.... I think you are absolutely right in having taken your time over it as the results clearly demonstrate! Your envelopes are stunning, so beautifully done and I love how you did the paper clips!!! I made some very similar ones just last night but really struggled getting the clip to stick to the top layer. Encasing it between two paper layers first is of course the answer, - thanks so much for that super clever trick! They look superb inside your journal!!!
ReplyDeleteI know exactly what you mean! Every month when I'm making my albums I find that I get so much done in one setting, then come back the next day and rethink everything I've done! LOL! Often wishing I had changed this or that and often taking things apart and starting again. Ha! The creative mind... I do adore what you're up to. These envelope pages are incredible and your bundled ephemera is truly a star! Love these awesome ideas and hope you'll make a video of the finished journal(s). Big hugs, Autumb
ReplyDeleteGlad I came over from Astrids. such lovely ideas for the details that make a project your own. a new subscriber to be sure. thanks so much for sharing.
ReplyDeleteThe details on this card are absolutely incredible. Each piece of this journal is crafted so elegantly, I especially love the envelope pages. Thanks for the share, love checking out your blog.
ReplyDeleteWorld of Animals
Wow !!! came here via Astrid's blog and I am certainly not disappointed. I need some journal inspiration right now and you have plenty here for sure !!
ReplyDeleteTFS and best wishes
Annie x
WOW, I am loving these! The portrait style envelope is brilliant with the flower die cut pattern in the front! The double ended envelope is simply brilliant, I am totally gonna borrow that idea if you don't mind! Love your shabby ribbon, so soft! Your clips are so beautiful, I just adore the stamp idea! Wow, I am so impressed with this journal, what a gorgeous creation!
ReplyDeleteIt's been quite the busy summer for me so far. I've had a baby Sparrow, a baby Grackle, a baby raccoon, two injured squirrels, a family of sick red squirrels and the last of the hawk attack victims!! I'm almost thankful for the sweltering heat outside, makes me feel like I'm not missing much when I'm stuck in the house all day. lol. The patio does make a great place to spend 5 minutes when I have it though! I do hope you have been enjoying your summer and having nice weather. Sending hugs and wishes your way!
Margaret, I don't even know where to start on leaving a comment! I am both thoroughly mesmerized and humbled by your beautiful and creative pages, papers, envelopes and ephemera clips! I've just gotten back from an extended vacation, and trying to quickly visit. I need to bookmark your post, because I am definitely going to have to explore this double sided envelope further, and give your clip idea a try! Sending great big hugs!
ReplyDeleteThis is just gorgeous and so stylish too. Happy crafting, Angela xXx
ReplyDeleteSigh! I just love this!
ReplyDelete