Tuesday, 18 February 2020

My First Envelope Mini

Hello dear visitors and welcome to my blog.  Hope you are having a lovely day.

I have to warn you, this is a huge post as I am sharing a Mini Album I made just recently.
I watched a video by Dawn Meadows where she created this little album.  (You can find her on  the BookVandal Shop You Tube Channel).  I loved her album so  much, I had to make one for myself .  This mini uses 3 large envelopes + 1 small envelope.
This is my very first envelope mini.  Have seen plenty on the net that I loved but never had the right size envelope to make them and so never really bothered.  When I saw this one though, I got the bug and as, again, I didn't have the right type of envelopes, I actually had to make them as well.  I won't actually show you how to make this album as I think Dawn's video does that better than I ever could.

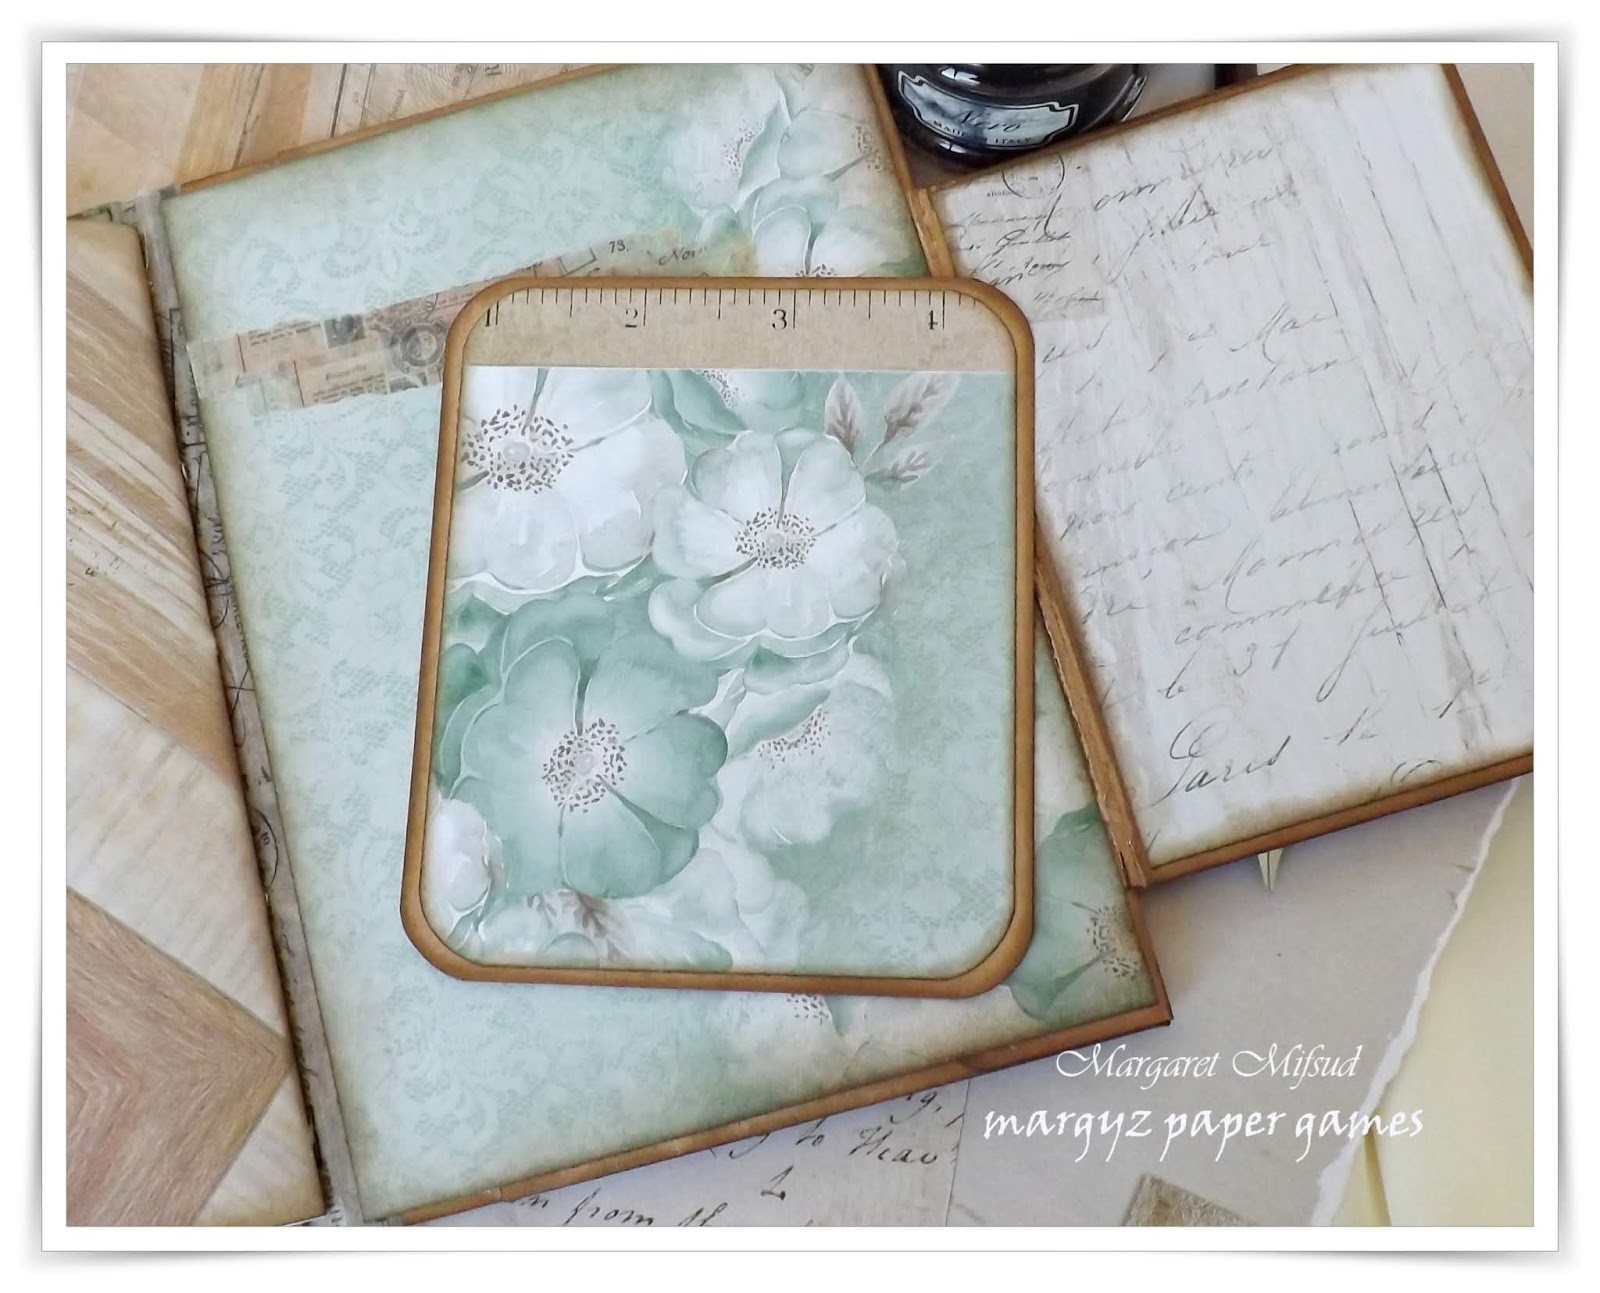
The finished album measures 7.75" x 5.5" and the papers I've used to decorate this Album is from a 12 x 12 pad called Memory Lane by Kaisercraft.
There's not a lot of embellishment on the front.   Just a piece of lace and a small collage.  I think the papers are pretty enough that they don't need covering up.
This album actually opens two ways.  The first opening is from left to right and reveals a pocket (on the left) and a notebook (on the right).  I will show the second opening later in the post.
There is a large tag inside the pocket.  
I attached a small piece of lace at the side and added some washi tape, book paper, a digital image by Ephemera's Vintage Garden and a gorgeous handmade seal made by Lizzy Hill
Lizzy is one of the crafty friends I exchange Christmas cards with and we usually include a small crafty gift as well.  I sent her a set of wildflower diecuts and she sent me a set of lovely little seals she had made.  I absolutely adore them and was so pleased I could incorporate one into this little album.
A small collage and a piece of lace decorate the front of the note book.
Used my fave stencils and added some stamping on the inside, but I've left the pages relatively bare as they are, mainly, to be used for journaling ..
.. although I have also added a few bits of lace and strips of washi tape.
The booklet is sewn into the main journal using pamphlet stitch.
A little stamping on the back of the note book as well as a small butterfly plate.
 Behind the notebook is another page with a flip out pocket (made with the smaller envelope) attached to the side.
Inside the pocket is a small tag.  The back of the tag is left blank for more journaling or you could add a photo.
That completes the left side opening of the album.
The second way to open the album is from right to left and this reveals a large pocket on the left and a simply decorated page on the right.
This flower is attached to an altered paper clip which can be moved to any other part of the book.
Inside the pocket is a simple, folded card ..
.. which could be used for photos, ephemera or journaling.
And, finally, the back of the album which also has a pocket ..
.. and a tag ..
.. with a little tuck spot on the back.
A final look at the front ..
Yayy!!  You managed to stick it out to the end.   Doing a little happy dance here!! LOL!!

I had such fun creating this album.  I do hope you will pop over to You Tube and take a look at Dawn's videos.  She has so many interesting albums, etc., and her tutorials are excellent!

I did say at the beginning of this post that I made this album for myself but, I ended up gifting it to a friend.  So now, of course, I am making another one.  The album I just shared was made pretty much as Dawn showed it but the new one will have some innovations of my own.  Hope you will come back to take a look at that one when it's finished.

I am entering this album into the Mini Album Makers Challenge for February
http://minialbummakers.blogspot.com/2020/02/february-mini-album-makers-tutorials-challenge.html


Thank you so much for stopping by and for the lovely comments you leave me.  I appreciate it very much.

Have a wonderful day!
Take care and God Bless.

Monday, 10 February 2020

Crafty Cardmakers Challenge #250 - Love

Hello everyone and welcome to my blog.
Hope you are all having a wonderful day!

Time again for another Challenge at Crafty Cardmakers.  (Didn't that fortnight go quickly?!)
Maike is our lovely Host and the Challenge is - Love is All you Need.

As always, you may create whatever you like, it doesn't have to be a card, as long as it follows the theme.

Of course, I have created another card for this Challenge.


This is another fairly simple card.
The papers are from Kaisercraft's Lady Like 6.5" paper pad.
Really love this collection .. so pretty!


The branch die is from the Wildflowers #1 set by Tim Holtz and the small flowers are by Little Birdie.


I added a mix of prills and micro beads amongst the little blossoms.


The 'Love you" flair was created with a greeting by K'craft.
I mounted it onto a couple of layers of cardstock for some extra dimension and then covered it with Glossy Accents.


This is not a traditional Valentines card as Hubby and I don't really 'do' Valentines, it will simply be used to send our love to whomever we decide to give it to.

Hope you enjoyed my project and would love it if you would pop over to the CCM blog and take a peek at the fab creations by my Teamies!  I'm sure you will be inspired to join in with the Challenge.

Crafty Cardmakers Challenge #250 - All You Need is Love

Thank you so much for stopping by and for the lovely comments you leave for me.

Enjoy the rest of your day and have fun with your crafting!
Take care and God Bless.

oxox Marg

Monday, 3 February 2020

Gauges & Prills - A Guy Card

Hello everyone!!  Thank you for stopping by my blog and
hope you are having a wonderful day.

  Just a quick little post to share a card I created for my oldest son's Birthday last year. 


The base card is made with black cardstock, and the paper was a piece left on my desk from another project.

The fabulous gauges were a free printable from the net.  I simply mounted them on a piece of chipboard which had been cut to size and then clear embossed them.


A touch of white embossing was added to the background, and then I added the Textured Subway diecut (made with black cardstock) and the circles chippie (by Scrapmatts).  Building up a bit of grunge and texture.


For more texture and interest, I added a sprinkling of black and white prills.  (I do love my prills  for adding that lovely touch of grit and grunge)

The Happy Birthday tag was taken from a paper pad by Kaisercraft.


Done and dusted!!

Thank you so much for your visit and the lovely comments you leave me.  I really appreciate it immensely!  Enjoy the rest of your day!

Take care and God Bless.


Monday, 27 January 2020

Crafty Cardmakers Challenge #249 - Black & White

Hello dear visitors and welcome to another CCM Challenge.

Glenda is our lovely host this time around and the Theme is Black & White!

As always, you may create anything you like as long as it fits the Theme!

I have created a clean and very simple card.


It is difficult to see but, the background paper, from Kaisercraft, has an embossed pattern on it.


So glad I didn't throw out the scrap of watercolour paper left over when I die cut this Wildflower for a previous project.  Turned out to be the perfect topper for this card.


The circle greeting is also by Kaisercraft.  I simply mounted it onto a few layers of black cardstock for a little dimension before attaching it to the card.


This would have to be the simplest (and quickest) card I have ever made and yet .. I like it!!

Would love for you to pop over and take a look at the fab creations by the rest of the Team.  So much inspiration to be had.

Crafty Cardmakers Challenge #249 - Black & White!

Thank you so much for stopping by and enjoy the rest of your day!
Take care and God Bless.


Monday, 20 January 2020

Art Journal Page - Find Your Fire

Hello sweet peeps and welcome to my blog.  So nice to have you stop by.

I've been rather slack with my blogging lately and thought it was about time to get a bit more active here.  I have still been crafting on a reasonably regular basis and do have a few things to share so I'm starting with this Art Journal page.  Made this quite a  long time ago so, hopefully, I will remember what products I used.


The base of this page is dp by Tim Holtz and I know I added the colour with Lindy's Stamp Gang Magicals.  These gorgeous little pots of powdered colour are a fave of mine.  So easy to use and absolutely gorgeous!


Lots of stamping with the Harlequin stamp by Kaisercraft and a crackle stamp by Prima ..


 .. and a piece of jute ribbon for some tactile texture along with a mixture of prills and microbeads.

Added a scattering of ephemera for extra interest ..


.. and topped it with a fabulous cogs and gears chippie which has been heat embossed with black, bronze and teal embossing powder.
The title was computer generated and mounted on a piece of heavy card.
To finish off, I did a bit of doodling around the edges and used a watercolour pencil to add some extra lines of interest around the page.

I so enjoy getting messy creating these kinds of pages and I have a few more of them to share at a later date.

Thank you so much for your visit and do enjoy the rest of your day.
Take care and God Bless.


Monday, 13 January 2020

Crafty Cardmakers Challenge #248 - Anything Goes

Well, hello everyone and a very happy new year to you all.

This is the first Challenge of the year for Crafty Cardmakers and so it was decided to start our year off with an easy 'Anything Goes' Challenge.
Our fearless leader, Lin, is hosting this one and there is also a one off prize on offer which was donated by the lovely Kim.

As this Challenge is Anything Goes, I thought it the perfect opportunity to share some of the Amigurumi dolls I crocheted recently.

 The patterns for all of these dolls were freebies from the net. 
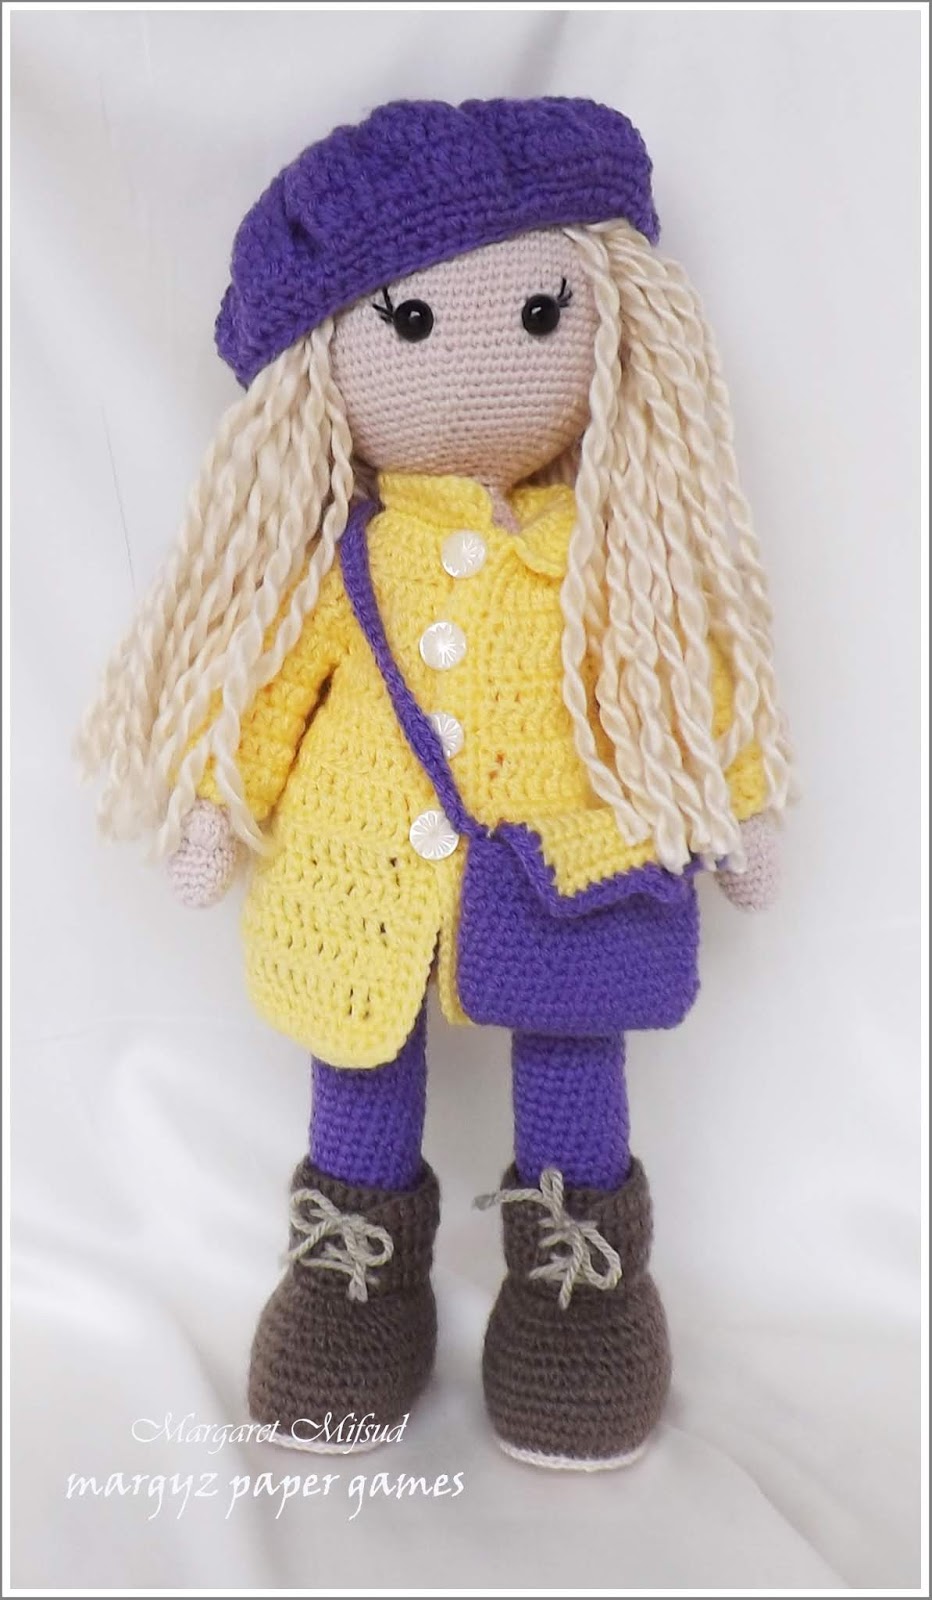
 This is the Kelly Doll and, if you are interested, you will find her pattern HERE.  She is made with 4ply yarn and I used a 1.75mm crochet hook.
As you can see, her beret is removable ..
.. as are her bag and jacket.  Her top, pants and boots are part of the doll and cannot be removed.
For her hair, I have used a super bulky yarn called Hometown USA by Lion Brand.  I actually split the yarn in two before hooking it to the head.

I made this doll a couple of months ago and cannot remember which pattern I used.  A touch of old age I think .. LOL!!   I do know that I used 8ply yarn for this one with a 2.00mm crochet hook. 
The dress is tied at the back with a couple of bows and is removable.
I love the hair on this doll.  It is also made with a super bulky yarn but I had this in my stash for quite a while and have no idea what brand or type it is.  Once it was hooked on and cut, I simply fluffed it out a bit.
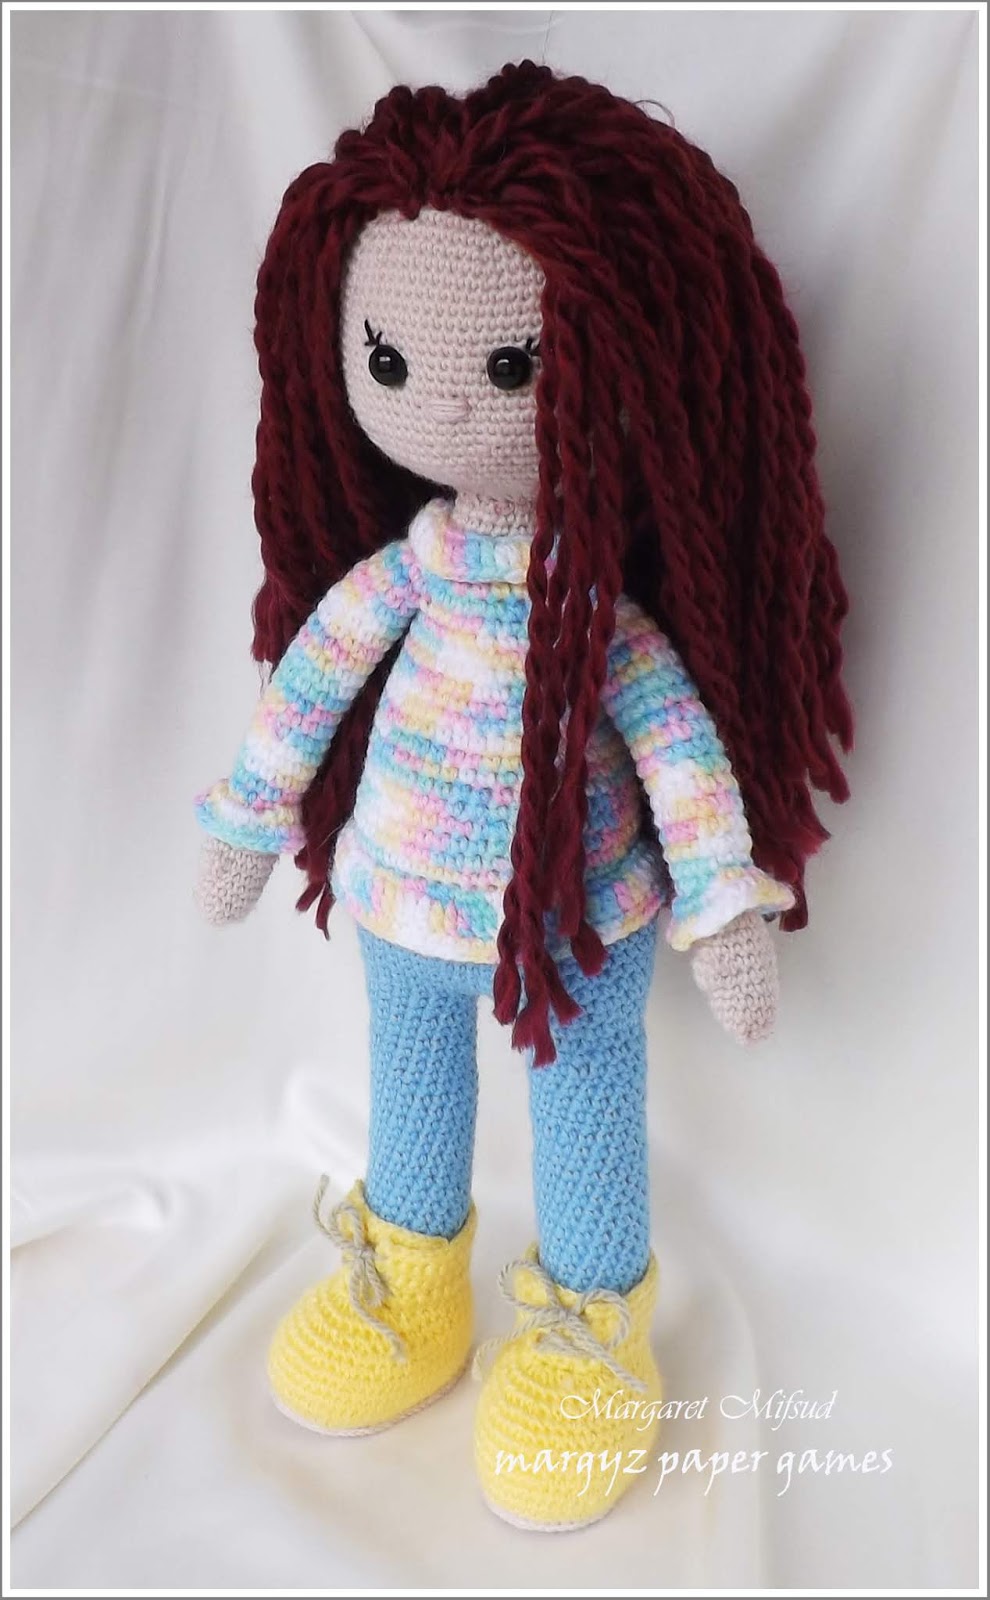
This doll was also made with the Kelly Doll pattern.  She is slightly taller as I added a few extra rows to her legs and I also gave her a different jacket.  It is so easy to adapt these patterns.  If you want a different look to your doll, simply add a few rows to make them taller or, you could also add a few extra stitches to change the shape.  Just make sure you adjust the rest of the pattern accordingly.
Her jacket is also removable and her hair is made from the same yarn as the first Kelly Doll.  Different colour obviously!  LOL!
I actually added a little nose to this doll and I think I might continue to do that for any future dolls.  I kinda like it!!  Might even decide to try adding a mouth .. won't hold my breath for that though.  Can be a bit tricksy!
I love these boots!  Sooo cute!!

Please pop on over to the CCM blog and take a peek at the fabulous creations by my Teamies.  I'm sure you will be inspired to join in!

Crafty Cardmakers Challenge #248 - Anything Goes

Thank you so much for stopping by.  I am going to make an effort to post a bit more often as I have been very slack lately.  Life gets in the way at times doesn't it?

Have a wonderful day!
Take care and God Bless.