Hello everyone and welcome to my blog, I hope you are having a lovely day.
Megs Garden has a new paper Collection called ' Forgotten Meadows'. Designed by Kerry-Jean Watson. It is soft and romantic and absolutely beautiful. The card I am sharing with you today is decorated with this collection and I must say I am totally in love with these papers.

This one is a Concertina Card, at least, that's what I'm calling it. I saw a tutorial on how to make it but, unfortunately (although I thought I had it pinned) I cannot find it again. My card is actually made a bit differently from the one I saw and so I decided to share a short step by step as well.

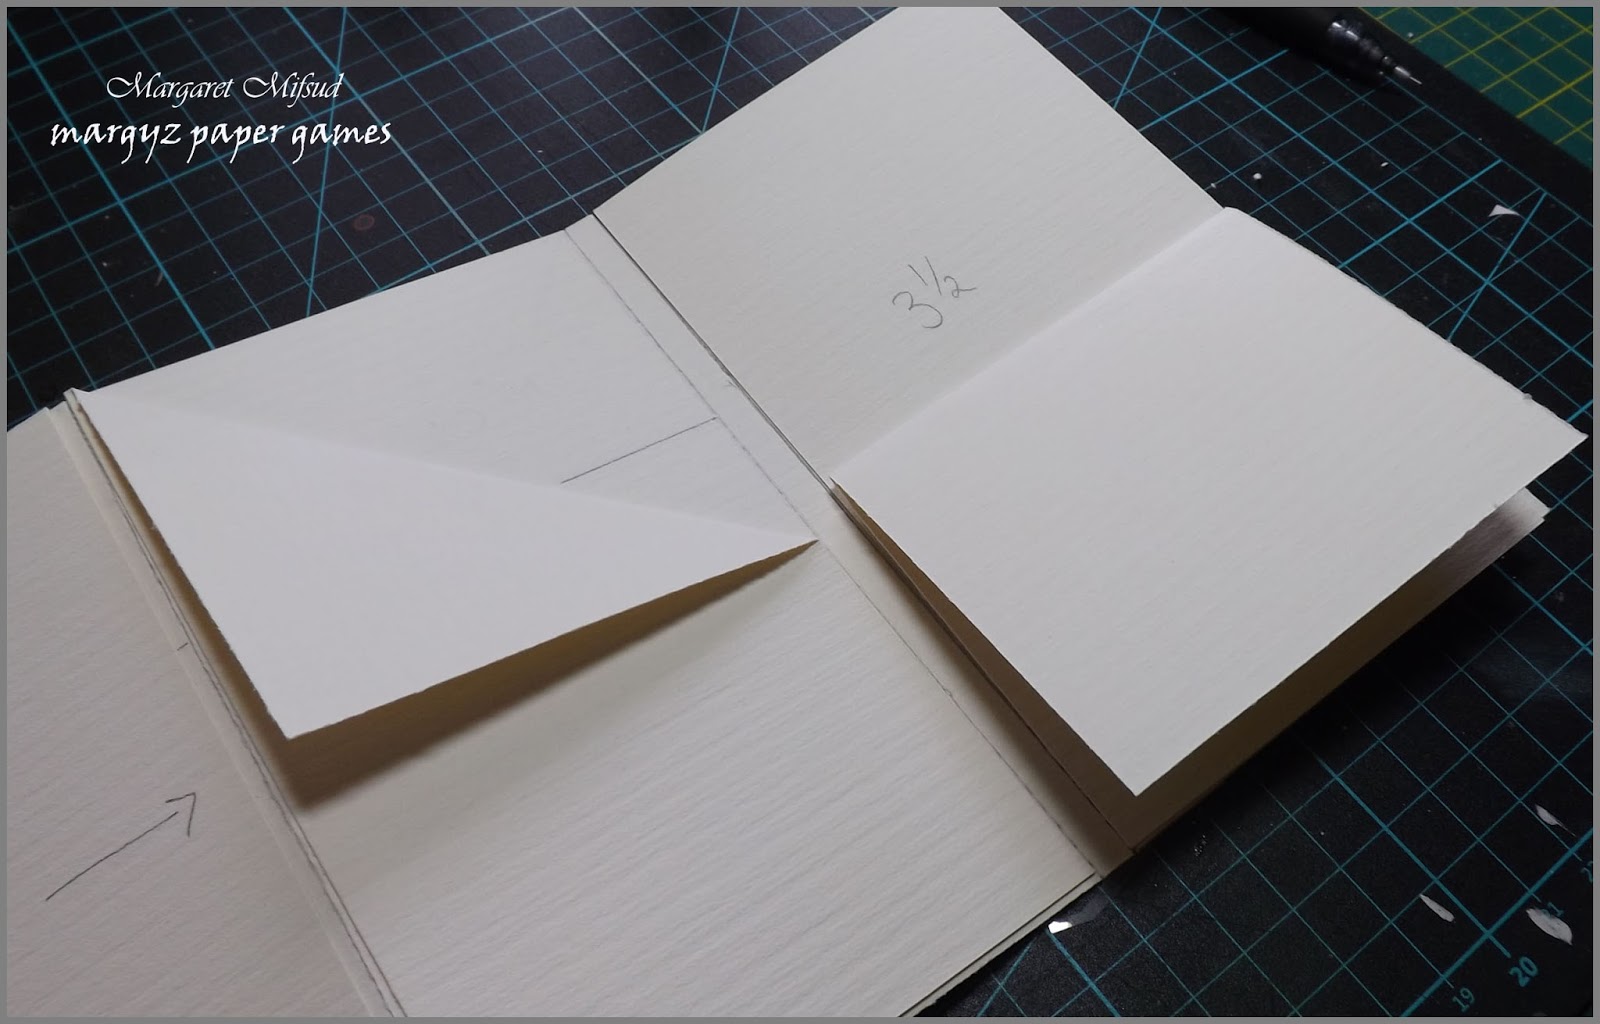
The original was made from one sheet of 12 x 12 designer paper and it was simply folded but I wanted mine to be a bit wider and so I have actually made it with cardstock. I only had A4 cardstock in the colour I wanted and I used three sheets. The height of the card is 6" and the finished width is 3.5". Of course, you can make it any size you like but this template only works for that size.
Cut your cardstock to a depth of 6" and then score according to the photo. I have added the small .25" gussets so that I could add some embellies and still close the card properly.

As the A4 cardstock isn't long enough for the whole card, you will need to cut another piece at 6" x 3.5" to attach to the end.

Use double sided tape or any kind of wet glue and attach the extra piece close to the last score line being careful not to overlap the score line otherwise it won't fold properly.

Fold the card as shown.

This is how it should look.
To add the pockets, cut 3 pieces of cardstock 6" long and only 3.4" wide (they need to be a tiny bit narrower so the pocket fits in between the folds) and cut another piece 6" x 3".

On the 6" x 3" pocket punch a small half circle on the left hand side and on one of the 6" x 3.4" pockets punch a similar half circle at the top.

The other two pockets could be folded as shown above or you can simply leave them as full length pockets as well.

Place the first two pockets on the left hand panels as shown ...
... and the other two on the right hand panels.

This is how the inside of the card should look. As I was sewing my paper onto the card I actually didn't glue the pockets down until after they had been decorated and found it was a lot easier that way. Once they were done I simply ran a thin line of glue around the edges (except for the open side of course) and stuck them down.
OK. Now that the step by step is done, I'll show you the details of my finished card.

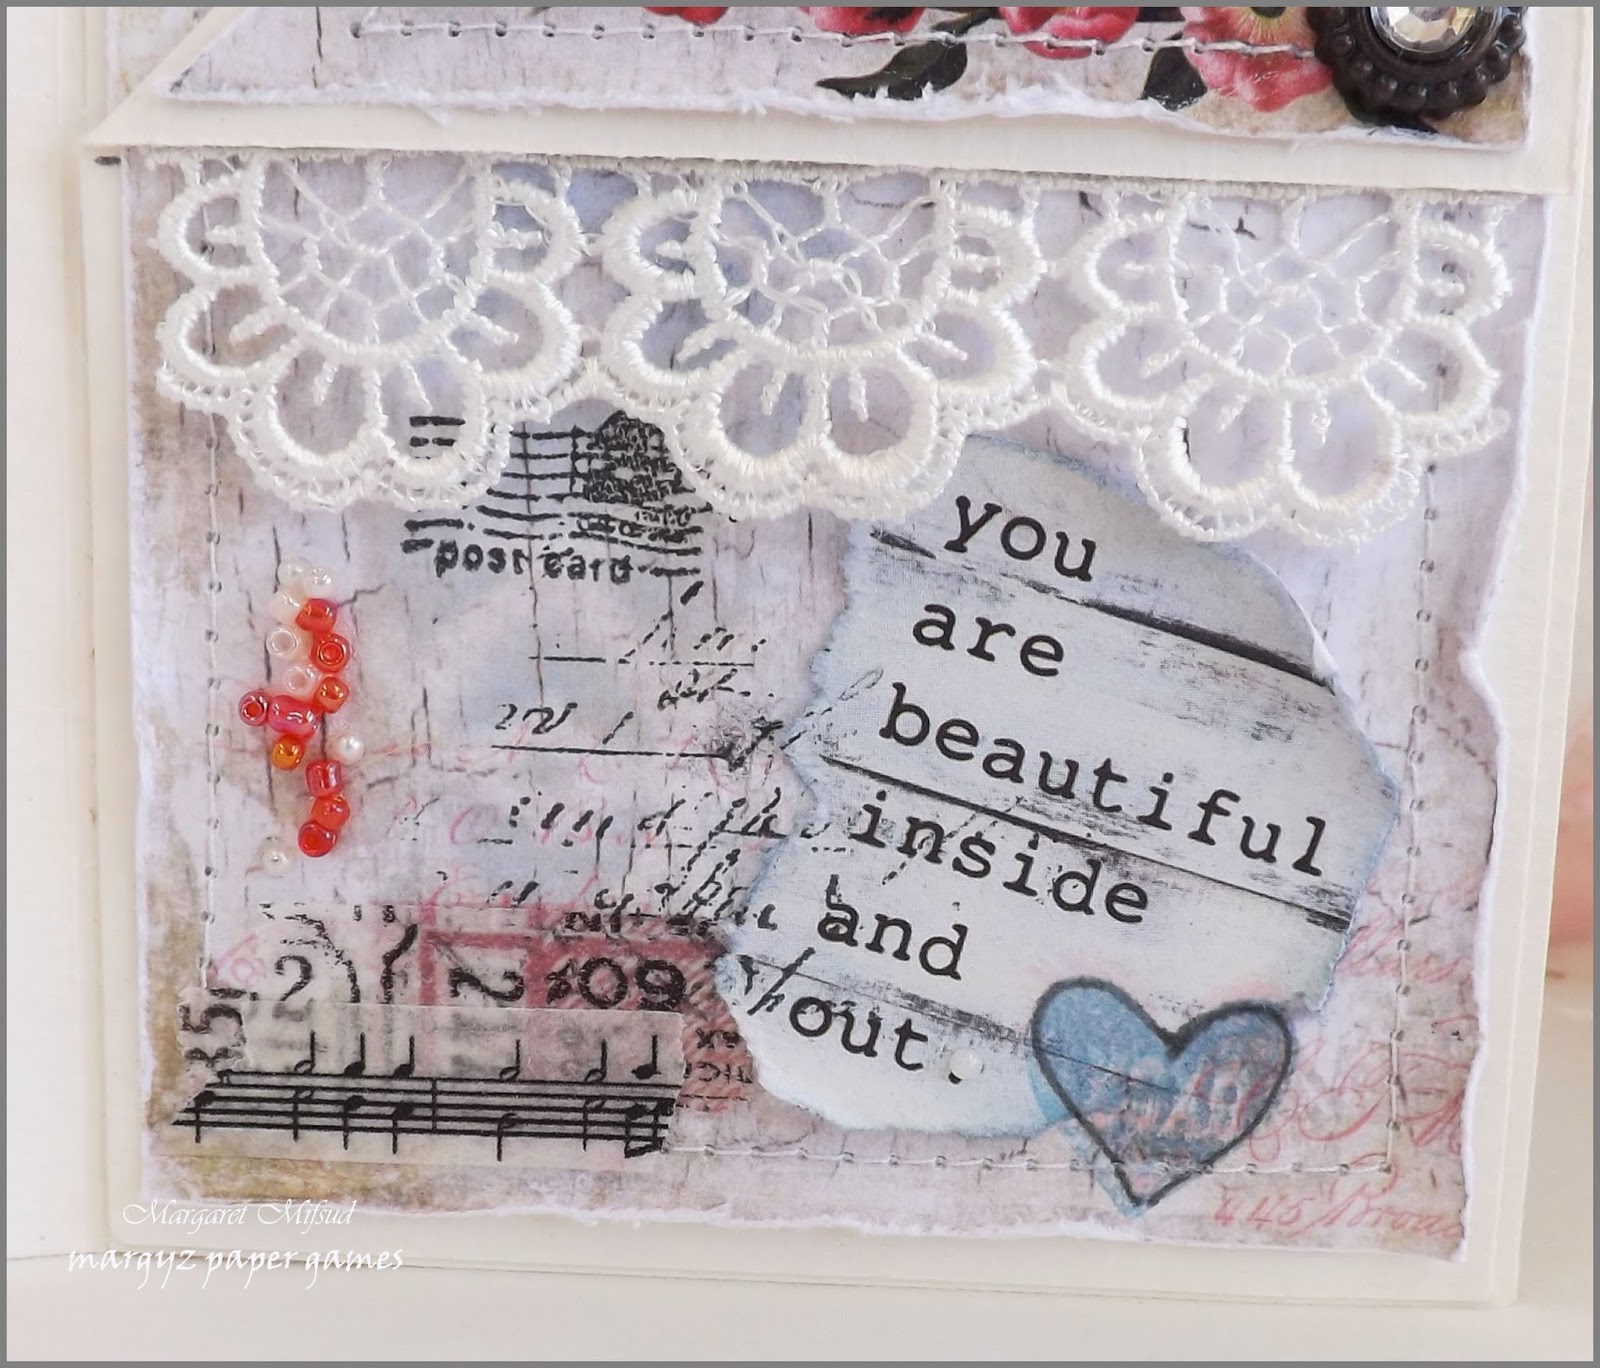
The papers are all from the Mini Paper Pack. I created the background on the front of my card with some texture paste and a stencil and then sprayed lighty with some Lindy's Stamp Gang sprays.

All the flowers came from Megs Garden. The fabric heirloom flower was originally plain white. I coloured the edges of it with a VersaColor pad. The ribbon was lightly coloured with Spun Sugar Distress Ink.

Here you can see some of the texture. As a base for my flower cluster I fussy cut one of the flower images from the Cut & Create page. I only glued the fussy cut image on each end as I wanted to close the card with ribbon and didn't wish to tie it over the flower cluster. By leaving the cut image free in the middle I could thread the ribbon through behind the cluster.

The Card Word Circle is a 2Crafty Chipboard piece. I coloured it with acrylic paint and, while it was still wet, I sprinkled it with clear glitter.


Those lovely daisies at the bottom on the left are part of the paper. Didn't I tell you this Collection was beautiful?

Added a little stamping, some washi tape and some seed beads. The tickets are also from the Cut & Create Page. The butterfly is from the More Butterflies Transparency Sheet.

This is the tag inside the pocket on the first panel. Stitched on some washi tape and scraps of paper for embellishment. A little technique I picked up from Heather Jacob. Thank you Heather, I love how it looks.

The second panel has some metal embellies that I covered in gesso and inked with Spun Sugar Distress Ink. It was a single piece that I cut in half. The chippy is again from 2Crafty Chipboard and was treated the same as the Word Circle on the front of the card. The large blue flower is from my stash but the small roses and rose buds are from Megs Garden. I won't show you the tag inside this pocket as it has a personal message on it.

I decided to do the diagonal fold on the pockets of the third and fourth panel. Love how it showcases more of the lovely graphics on these papers and it gave me an excuse to use those pretty vintage brads to hold them down. (not that I needed an excuse but it sounds good. LOL!!)


The tag from this pocket ...

... and the tag from this pocket.

The back of the card. I did glue the ribbon down on the back before adding the paper as this end does not need to move.

The inside of the card when open ...

... and the back.

Well, we are finally at the end. I hope you enjoyed this post and that the step by step makes sense to you. Why not go over to Megs Garden and check out the stunning creations made by the rest of the Team. I'm sure you will be inspired. HERE is the link.
To take a look at all the fabulous products Megs Garden has in store just click HERE .
Megs Garden products used
Forgotten Meadows Mini Paper Pack
Forgotten Meadows Cut & Create
Filigree Long Oval
White Heirloom Flower
Puffy Paper Flower
Velvet Primrose
More Butterflies Transparency
2cm Off White Lace
Seam Binding
Mini Rosebuds
Small White Roses
Thank you so much for visiting and do enjoy the rest of your day.
Take care and God Bless.
oxox
Marg

A beautiful card and a lovely shape as well. Lots of lovely details and embellies. Thanks for the tutorial! hugs, Marlies
ReplyDeleteThis is a most spectacular project. So absolutely stunningly gorgeous!
ReplyDeleteSTUNNING card Marg and such a brilliant tutorial, love all the pockets and things, makes it so much more than just a card! Beautifully decorated too! You have just inspired me to finally do something with my papers that have been lying ready printed for ages....
ReplyDeleteOh my goodness! This is such a lot of work....love that pretty pp too.....& the little sayings, the pretty embellies. What a SPECIAL project. Thanks so much for sharing how it is made, too:):)
ReplyDeleteWow Marg this is a thing of beauty... Love the step by step too.... So much work has gone into this and it is just gorgeous. I have bookmarked to make but not sure I will ever get around to it :O This is one of my faves of yours I think.
ReplyDeleteBeautiful work,gorgeous cards Margaret
ReplyDeleteHi Marg! Well your card looks amazing, pretty paper and embellishments, and you are clever to make these wonderful liitle card books, very inspiring! Have a good weekend!
ReplyDeleteTotally stunning Marg. Thanks for the step-by-step. It was so interesting to read!
ReplyDeleteA lovely, elegant card, to showcase the gorgeous papers and beautiful embellishments from Meg's garden. Thanks for the step by step instructions. Like Val, I'm not sure that I will ever get to make it, but you've explained it really well. Lucky person to receive this exquisite card/gift :D
ReplyDeleteOh my goodness! What a work of art! This is truly amazing.
ReplyDelete