Friday 26 March 2021

A Pair of very Simple Little Cards

 Hello everyone and welcome to my blog.  Hope you are enjoying your day.

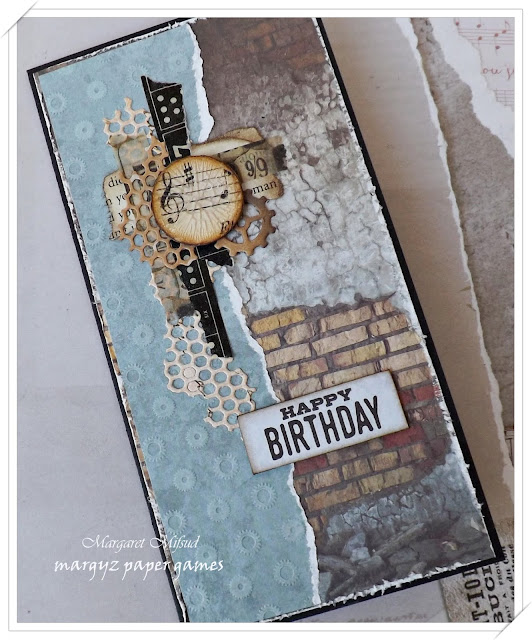
Just a quick post to share a couple of very simple and easy cards.  These two cards were made when I found some scrap bits of dp among the multitude of left overs on my desk.  I had been making some notebooks (which I have already shared HERE) and was actually tidying up a bit (I know .. shock, horror!!  LOL!) when I found these little scraps and thought they could be used to make some pretty cards.

 I looked a little further around my desk and found some left over  bits of ephemera as well.  So, I simply layered them together, added a touch of lace and ..  voila! .. my cards were done.

Simple and quick to make, and yet, quite pretty!

Thank you so much for stopping by.  

Have a wonderful day!
Take care, stay safe and God Bless.

Tuesday 16 March 2021

A new Pencil Box

 Hello and welcome everyone.   A special welcome to my new followers.  So happy to have you join us.

Quite a while ago .. over a year ago now .. I was into colouring books.  I really enjoyed sitting in front of the telly watching whatever and colouring in.  I found it very relaxing.  Well, for some reason or other I stopped doing it until just recently when I saw a few posts by Lisa Landry about her colouring journey.  It got me interested again, so I bought a few books and went looking for my pencils.  Well, do you think I could find them?  I had so many you'd never think they would get lost .. but they did.  So, off to the shop and bought some more .. and then some more .. and then .. you get the picture.  Anyhow, my pencils were overflowing my pencil tin so I decided to create myself  a pencil box.  

The inspiration for this box came from JenofEve's Keepsake box.  I only have the small and medium sized templates and so had to adjust them to the size I wanted.  I also had to adjust the size of the digital papers I used to cover it.  The papers I used are from JenofEve's 'Shades of Colour' Collection and Antique Paperie's 'Rue Garden' and 'Simple' Collections.

The box measure 8" x 11" and is 1.5" deep.

I created 6 removable trays for my pencils.   Thought it would be easier to find the colour I was looking for if I could put diffferent shades of the same colour in each one and they are removable so it would be easy to get the pencils out.  The inside of the box is lined with the Shades of Colour papers by Jen Harrison of JenofEve Designs.


 Each little tray is covered with the 'Simple' papers by Sherri Mitchell and the inside is lined with tea stained papers.


A view of the side of the box .. 
 
 
 .. and the bottom.  I used four wooden beads for the feet.
 
 Here it is with all the colours inside.  As you can see, I have plenty of room for more pencils.  He! He!
 
The outside of the box is covered in the Rue Garden papers by Sherri Mitchell of Antique Paperie.  As I said before, I had to adjust the size of the paper to make it big enough to fit and ended up with just half of the design but I love it!  Looks so pretty.
 

There's not an actual closure.  I've simply attached a little charm and beads dangle.  You can see where the paper sits up a bit because of the wire underneath.  Couldn't figure a way to get rid of that but, I don't really mind as, IRL, it doesn't really show very much and doesn't interfere with anything either.


Have been using this for a few days now and I am loving it!!
 
That's all for now folks!  I have been neglecting my blog lately and can't promise that will change.  I'm still creating but I seem to be doing lots of things all at the same time and, when I finish one, I'm too busy with the others that I forget to post it.  Am still making a couple of books right now so hopefully, when I remember, will post them when they are done.
 
Thank you so much for your visit and enjoy the rest of your day.
 
Take care, stay safe and God Bless.


Thursday 18 February 2021

More Manly Birthdays

 Hello everyone!  Hope you are all having a wonderful day!

Thought it was about time I shared another set of cards.   They were actually created for the same person's birthday.  The first one was made in 2019 and the second was done last year.  Goes to show how far behind I am in sharing things with you. 

This card was made at a time when I was starting to simplify my crafting.  It still has a fair bit of embellishment but not quite as much as I usually did.
Two layers of paper.  The one on the top is just slightly smaller so that the bottom one can be seen.  There's embossing and stamping on the background and, over that, I've layered a die cut with the chipboard cogs on top.  The cogs were coloured with Distress Inks and a light rubbing of Twinkling H2Os.
To finish off, I added a scattering of prills. 
This card is a similar design just a whole lot simpler.
Still two layers of paper but the top one was torn down the center so you can see a lot more of the bottom piece.  Instead of the embossing and stamping, I simply added a touch of rose gold foil
No die cuts here .. Just a piece of torn book paper underneath the cogs and clocks.  The Happy Birthday chippie on both cards is by Scrapmatts.

Here they are again, side by side.   

Thank you so much for stopping by.  Do enjoy the rest of your day.

Take care, stay safe and God Bless.
 

Monday 1 February 2021

Repurposing my ATCs

 Hello everybody and welcome.  

A very warm welcome to my new followers.   So very pleased you are joining me on my creative journey.

Another quick post to show what I've been up to.  

My mojo is still missing but I did need to make some cards for upcoming birthdays.  So, what to do?

As I was hunting for inspiration I came across some ATCs I created a few years back.  They've been sitting in a box gathering dust and I thought, why not repurpose these?  So this is what I've done.

These ATCs were created for a Crafty Cardmakers Challenge back in 2018 .. if you'd like to see how they were created HERE is the post.
I changed the words ..
..  popped them onto some card blanks.
.. and this is how they turned out.  
Might be cheating a little bit but .. cards done and dusted!

That's it for now.  I'll have a few more of these to share later.

Thank you so much for stopping by and enjoy the rest of your day.
Take care and God Bless.

Tuesday 26 January 2021

Happy Birthday

 Hello everyone and welcome to my blog.  

Just a quickie post to share some cards I created last year.  

The mojo went west a while ago and has not yet returned so I'm posting cards I made previously that haven't yet been shared.

Most of the papers used for these is by Kaisercraft.  They are from some older  collections.  I'm trying very hard not to buy new papers as I have a ton in my stash.  Must confess, I caved in and bought a few digital ones though.   Nothing new on these though .. all of the bits and pieces are from my stash.

Tore up a few tickets and labels and such, and layered them to create a small collage.

The Happy Birthday is a word chippy by Scrapmatts
 Used a few die cuts and a handmade flair, which was left over from a previous project, as well as a piece of torn washi tape and bits of ephemera in this collage.
The greeting on this card was generated on my computer and mounted on a piece of cardboard.
 
Hopefully, the mojo will return to base soon but, in the meantime, I will post things made previously but not yet shared. 

Thank you so much for stopping by and for any comment you may care to leave.  I truly appreciate you taking the time to visit.

Take care, stay safe and God Bless.

Wednesday 20 January 2021

Notebook Covers

Hello everyone and welcome.  

I hope you all had a great start to the new year.

It's been so long since I posted anything here.  I started writing this last year and thought it was about time that I got it finished!  LOL!!   

So, here I am to share a couple of notebook covers I created as Christmas presents.  These were a last minute idea and I used them as stocking fillers.
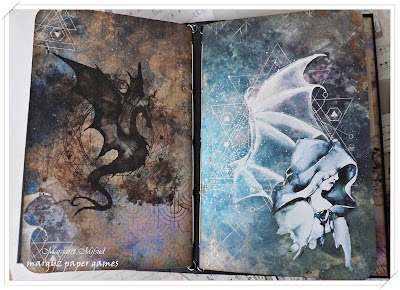
 The papers I used are all digitals by Vectoria Designs on Etsy.  The dragon papers are from the Dragon Journal Kit and the floral papers are from the Vintage Flowers Journal Kit.  I was going to post these books separately but, as they are very much the same, I decided to show them together instead so you will find the Dragon book on the left side and the Florals book on the right.  Simply click on the picture to get a larger view.  Having said that, I won't be doing my posts this way again.  With the new Blogger set-up, it was a total pain to edit.  Had to keep jumping back and forth from draft to preview just to get it looking right.  It was a nightmare.  If anyone knows of an easy way to do it like this, please share.  I did not enjoy the experience.


 The design is also by Vectoria Designs.  There is a tutorial on their YouTube channel HERE


 I did change the design up a bit by covering the spine with fabric.   The papers on the cover of both books are edged with rose gold foil.


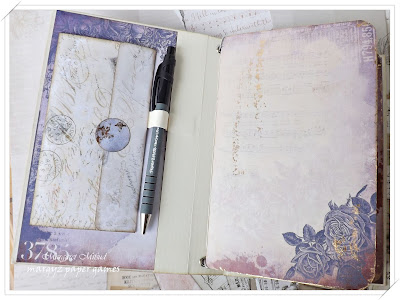
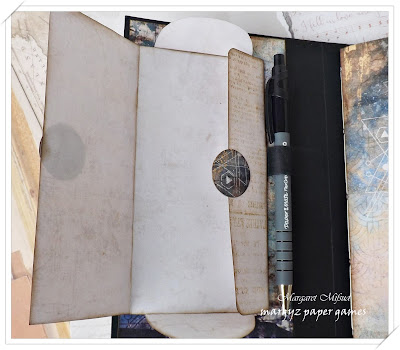
I loved that this design has a pen holder on the inside front cover.


As well as the pen holder, there is also an envelope inside the cover.  Mine is a deconstructed envelope ..

 
 .. which is held closed with magnets and will come in handy for holding small tickets and/or notes, etc.


I've hidden the magnets under the seals.


There are two removable signatures in this book.  The first is a plain notebook containing lined pages.


  These papers are also digitals, this time from ArtyMaze.  They are from the Floral Collage Kit. 


The second signature is a small junk journal. 


It can still be used as a notebook but, with the different sized and coloured papers, it is visually more stimulating.


I won't show all of the pages in these junk journals, this post is long enough already.  I'll just show the odd one or two .. or three.  LOL!!

This page has an envelope attached to it with a paperclip.


Here is a journaling card also attached with a paperclip.


The journaling card on the right is attached with washi tape and can be lifted for some secret writing underneath.  You can see the flap of the envelope on the left.


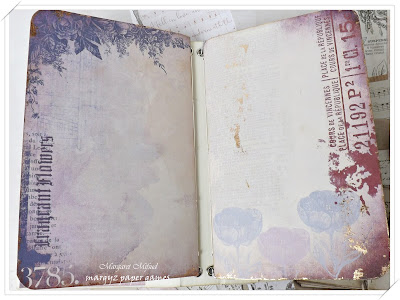
There is a little bit of stencilling done throughout both books for some more visual interest.


As stated before, there are different coloured and different sized papers in this part of the journal.


I have used a mix of plain papers, tea stained papers, designer papers and scraps I had in my stash. 


I simply mixed them up until I was happy with the look of them.


There is a diagonal pocket on the inside back cove wich will come in handy to store loose papers, etc.


This pocket was also edged with rosegold foil.


The back covers were also edged with rose gold foil.


I hope you enjoyed seeing my little books.  I'm certainly pleased I finally finished this post.  Hopefully, my next one won't take so long to do. 


Thank you so much for your visit and any little comment you may care to leave. I must apologise for not visiting much lately and I do hope to be a bettter blog visitor from now on.  In the meantime, please take care and stay safe.  
God Bless.