Hello everyone and welcome to my blog.
Gosh, it's been ages since I posted anything here so I thought it was time I showed you some of what I've been doing.
I have been watching a lot of videos lately. Crafty ones of course. Well, mostly crafty ones. One lady I have been watching a lot is Jennifer Harrison of
JenofEve Designs. She has a lot of videos on different styles of mini albums and items related to them which can also be used in other types of crafting. One of her ideas which appealed to me is the use of work trays. I was already using plastic trays to store some of my stash, but Jennifer used hers to hold the things she was using in the particular project she was working on. I really liked this idea, mainly because I am always losing things amongst the mess on my craft table. I know, I should tidy it up after each project but, unfortunately, that very rarely happens.
Anyway, although I haven't used Jen's templates, I decided I would create some work trays of my own.
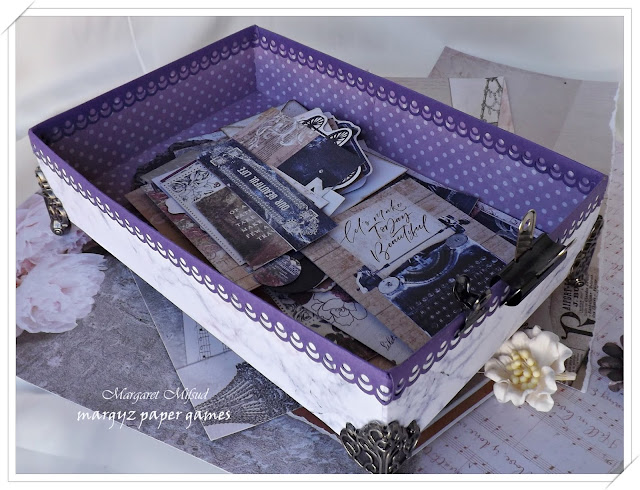
This was a tray I already had made up. I simply covered and lined it with new papers and edged it with cardstock. The papers are from Kaisercraft's Misty Mountains Collection.
Found the feet in my stash. I think they were purchased at a Craft Fair a few years ago and never used. They certainly came in handy and I need to find some more. I used Martha Stewart's Doily Lace Edge Punch for the trim.
The larger tray was made from a Cereal Box. I simple cut off the front, reinforced the corners and then lined and covered it with papers from the same collection as above. At the moment it's full of journal cards and ephemera I am using for a little album I am making. So handy having them in the one place instead of spread all over my desk.
Pretty sure the feet on this one are by Tim Holtz. I actually rescued them from another box which was heading for the bin. The trim was punched out with Martha Stewart's Optic Dot Edge Punch.
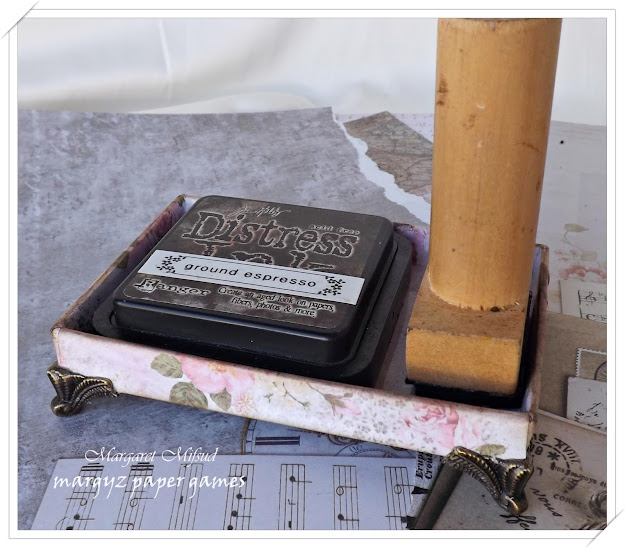
As well as the work trays, I made a couple of work stations. You may be wondering what's the difference between Trays and Stations. Well, the trays can be used for different things. Different projects, different stuff. The Stations, on the other hand, always have the same purpose. So, this Ink Station will always be used to hold an ink pad and applicator. The one at the back actually sits permanently on my desk. Now my ink pad won't ever get lost amongst the mess.
The papers used to cover these are digitals. The floral is from
ArtyMaze, (the link will take you to the video where she shows the kit. If you wish to get the kit, please subscribe to her channel as this is a freebie for her subscribers) the collage paper I have had for ages and have no idea where I got it from. Both are really pretty.
You can't really see it in these photos but I have placed a piece of acetate in the bottom of the station so it's easier to keep it clean.
This is the one I use all the time and you can see how dirty it does get from the applicator. Having the acetate in the bottom means I can simply wipe it clean with a damp cloth.

I also created a glue station. One to hold double sided tape and a few wet glues as well. Again, I've used the floral paper by Artymaze.
Unfortunately I had no metal feet left for this station but, I had recently watched a video by
Vectoria Designs showing how to make these little feet from cardstock and that is what I used here. Really easy to make but, instead of using brads, I used a few sticky back gems. (Yes. You guessed right. I forgot to add the brads before glueing them onto the corners. Duh!!)
Double sided tape in the back and wet glues in the front. Perfect. This one is also permanently sitting on my desk.
I've been using these for a few weeks now and I am really happy with them all. Now I don't have to worry about losing my glues and ink pads no matter how messy my work desk gets.
On a different note .. I have just written this post with the new blogger. This is the first time I have actually gotten all the way through without having to revert back to legacy because it was too hard to work out. They have obviously been listening to all the complaints and have made some changes. I can't say I love it but at least it was do-able.
Thank you so much for stopping by. I must aplogise for not visiting much lately. Life has been a bit topsy turvy for a while but, I am hoping, that is sorting itself out now.
Have a wonderful week and do enjoy your crafting.
Take care and God Bless.


