Tuesday, 30 December 2014

2Crafty December Shares #3

Hi everyone, so pleased you could drop by at this busy time of the year.  
This is the last of my 2Crafty December shares and it is an AT Block.
2Crafty Chipboard used
ATC Hearts & Stars
Interlocking Grid Panel
Funky Heart Swirls
Summer Leaf Stems

The front with the Interlocking Grid Panel ...

... right side with 1 piece of the Summer Leaf Stems and 1 piece from the Funky Heart Swirls on the lid ...


... and the left side with another piece from the Summer Leaf Stems.


Both of the Summer Leaf Stems were coloured with Peeled Paint Distress Ink.  I also opened up the tips of the leaves by wetting them thoroughly and then gently separating the layers.  Once dry I coloured the inside with Pine Needles DI.  I  then sprinkled some clear glitter on the leaves for a bit of sparkle.  


Underneath the leafy stems you can see some Viva Crackle Paint that I spread through a stencil.  I was so thrilled at the way it turned out.  I think it looks fabulous.  You can see it better in the photo below.


Isn't it awesome??  After the crackle was dry I dabbed on some silver Distress Paint and, did I tell you I love the result??  This is definitely staying in my repertoire.   Gotta say it again, I love it!! 


The Interlocking Grid Panel was heat embossed in silver and then I very gently bent it to fit around one corner of the Block.  Once it was glued down I added some micro beads to the section on the front.


Tucked in amongst the flowers are the small stars from the ATC Hearts and Stars.  I attached them to some wire so they would stand up and also added some micro beads to the front of them.


 The main stem of the Funky Heart Swirl was lightly coated in gesso and then sprinkled with glitter.   The little hearts were coloured with nail polish and, while they were still wet, I added some micro beads ...  


... and so, as this is my last post for 2014 ...


I would like to wish you all a very, very Happy New Year.  May each new day be filled with happiness and love.
Thank you so much for visiting and I hope you have found a little inspiration here.  Hope to see you back in the New Year.
 
and remember, to find a 2Crafty Chipboard stockist near you, simply send an e-mail to
salesat2crafty@optusnet.com.au
 
Take care and God Bless.
 
Photobucket

Monday, 29 December 2014

2Crafty December Shares #2

Hello everyone and welcome to my blog.  Hope you are having a fantastic day and thank you so much for visiting at this busy time of the year.
Not long to New Year now!!!   Woo!! Hoo!!
The second of my 2Crafty December projects is a soft and feminine card.
2Crafty Chipboard used
ATC Birdcage
Card Word Circles - Sentiment


Both chipboard pieces were treated in the same manner.  Firstly coloured with VersaColor Umber and then coated with Glossy Accents.  One of the reasons I love working with this chipboard is, you don't have to go to great lengths to make it look fantastic.  You can either just leave it raw or use very simple techniques to add the colour you need.


These Card Word Circles are simply fabulous, they are the perfect size for any card and you get a selection of 6 different greetings in each pack.


The Birdcage comes in a pack of two and you get two little birds with it as well although I didn't use them here.  
That stunning bloom is available from Megs Garden as is the mesh ribbon underneath my embellies.  I also added some small beads to the cluster  along with some lengths of twine.


A view of the inside ... just waiting for the sentiment.


Hope you enjoyed this post and that I have inspired you a little.  Tomorrow I will be posting the last of my December Shares.  Hope to see you back here then.  In the meantime, why not go over and take a look at all the wonderful projects created by my Teamies HERE

and remember, to find a 2Crafty Chipboard stockist near you
simply send an e-mail to salesat2crafty@optusnet.com.au

Thank you so much for visiting and  enjoy the rest of your day.
Take care and God Bless.
oxox Marg


Sunday, 28 December 2014

2Crafty December Shares #1

Hello everyone, and welcome.  So pleased that you made the time to visit at this busy time of the year.
So, Christmas has come and gone and I hope you all had a fabulous day and didn't suffer too much with the holiday hangover.  Now we can look forward to the New Year and, probably, an even worse hangover!!  LOL!!
It's my turn again to share some things I made using some fabulous pieces from 2Crafty.
First up is a very masculine card made for my oldest son's Birthday last month.  
2 Crafty Chipboard used
Hessian Patch Panel
World Globe & Ink Set
As I am wont to do on my cards nowadays, I added some patches of Clear Rock Candy Crackle to the paper.  I love that textured look, especially on 'man' cards.
 

I only used the quill and ink bottle from the World Globe & Ink Set.  The ink bottle was coloured with Black Soot Distress Ink and then covered in Glossy Accents.  For the quill, I coloured the feather with VersaMagic Cloud White and added some light shading with VersaMagic  Midnight Black.  The spine was then coloured with  Distress Ink and coated with Glossy Accents.


The Hessian Patch Panel was cut into three pieces and was left mainly raw.  It was just lightly sponged with gesso as I didn't want too much colour on it.  The pieces were then layered in between the papers.  I really love how it looks, it just added the perfect accent to my card.


Once everything was assembled I simply dry brushed some gesso around the card, just as a highlight and accent.

 
This was the first of my 2Crafty Chipboard December projects.  I will be sharing 2 more over the next couple of days and I do hope you will have the time to come and look.   
 
Thank you so much for visiting and leaving a little comment.  I would love to know what you think.
and remember, to find a 2Crafty Chipboard stockist near you simply
send an e-mail to salesat2crafty@optusnet.com.au
 
Take care and God Bless
oxo Marg
 

Tuesday, 23 December 2014

A Lovely, lovely Christmas Surprise!!

Hello lovely people and thank you for dropping by at this busy time of the year.
I did think my previous post was going to be my last before Christmas, but today I got a lovely surprise which I simply had to share.
I have been very blessed to have come to know a lot of very talented people out there in blog land and, quite a lot of them I have come to call my friend.  Some, I have even been lucky enough to meet personally but others I have never met and probably (unless I am extremely lucky) never will.  Well, this morning in the post I received the loveliest surprise from one of those friends who lives on the other side of the world and whom I, unfortunately, will most likely never meet.
I received a Christmas card from Astrid Maclean and I am over the moon.  Astrid and I, through a set of circumstances I won't go into here, did exchange cards last year but, as she is away from home over Christmas and as she is an extremely busy lady, I really didn't think it would happen this year so, to my extreme dismay, I didn't actually make one for her and then, this morning, I received this gorgeous card from her.   


I am always amazed at Astrid's art.  She has a wonderful eye for colour and composition and the techniques she uses to make her projects are brilliant.


I love the embossing and the way she blends the different colours so beautifully.


Love the heart with that little twine bow.  Such a lot of work went into this card, these photos really don't do it justice.  


Absolutely stunning work!!


Thank you, so much Astrid!!  It was such a lovely surprise to receive in the mail this morning.  Your card is divine and I will treasure this forever.
I have a box where I keep all my most special cards.  Some were made by my children when they were little and some were made by my grandchildren and also some from special friends (Astrid's card from last year is in this box), some of whom are no longer with us.  Every once in a while I get my box down and sit quietly to look at them all and remember when I received them.  After I finish displaying this card (which will probably be for a very long time) it will go into this box as well.
I am so sorry that I didn't reciprocate this year Astrid, but I will definitely correct that mistake for next year.  I wish you and your family a very Merry Christmas and a really lovely holiday with lots and lots of hugs and kisses for you from your grandchildren.  Blessings to you all.

For anyone who doesn't know Astrid, her blog is Astrid's Artistic Efforts and you can find it HERE.  I urge you to go and take a look, her work is amazing!!

A very Merry Christmas to all my lovely followers and visitors too.
Thank you so much for dropping by and enjoy the rest of your day.

Take care and God Bless

oxox Marg


Monday, 22 December 2014

The last of my Christmas Cards

Hi everyone, welcome to my blog space.  So happy you could drop by at this busy time of the year.
Can't believe it's only three more sleeps to Christmas.   Is it just me, or did this year go by even quicker than the last??
I have the last of my Christmas cards to share with you.  Well, the last for this year anyway.  Once again these are very similar to the previous ones I've shown you.   Same ingredients, just a little different in the arrangements!


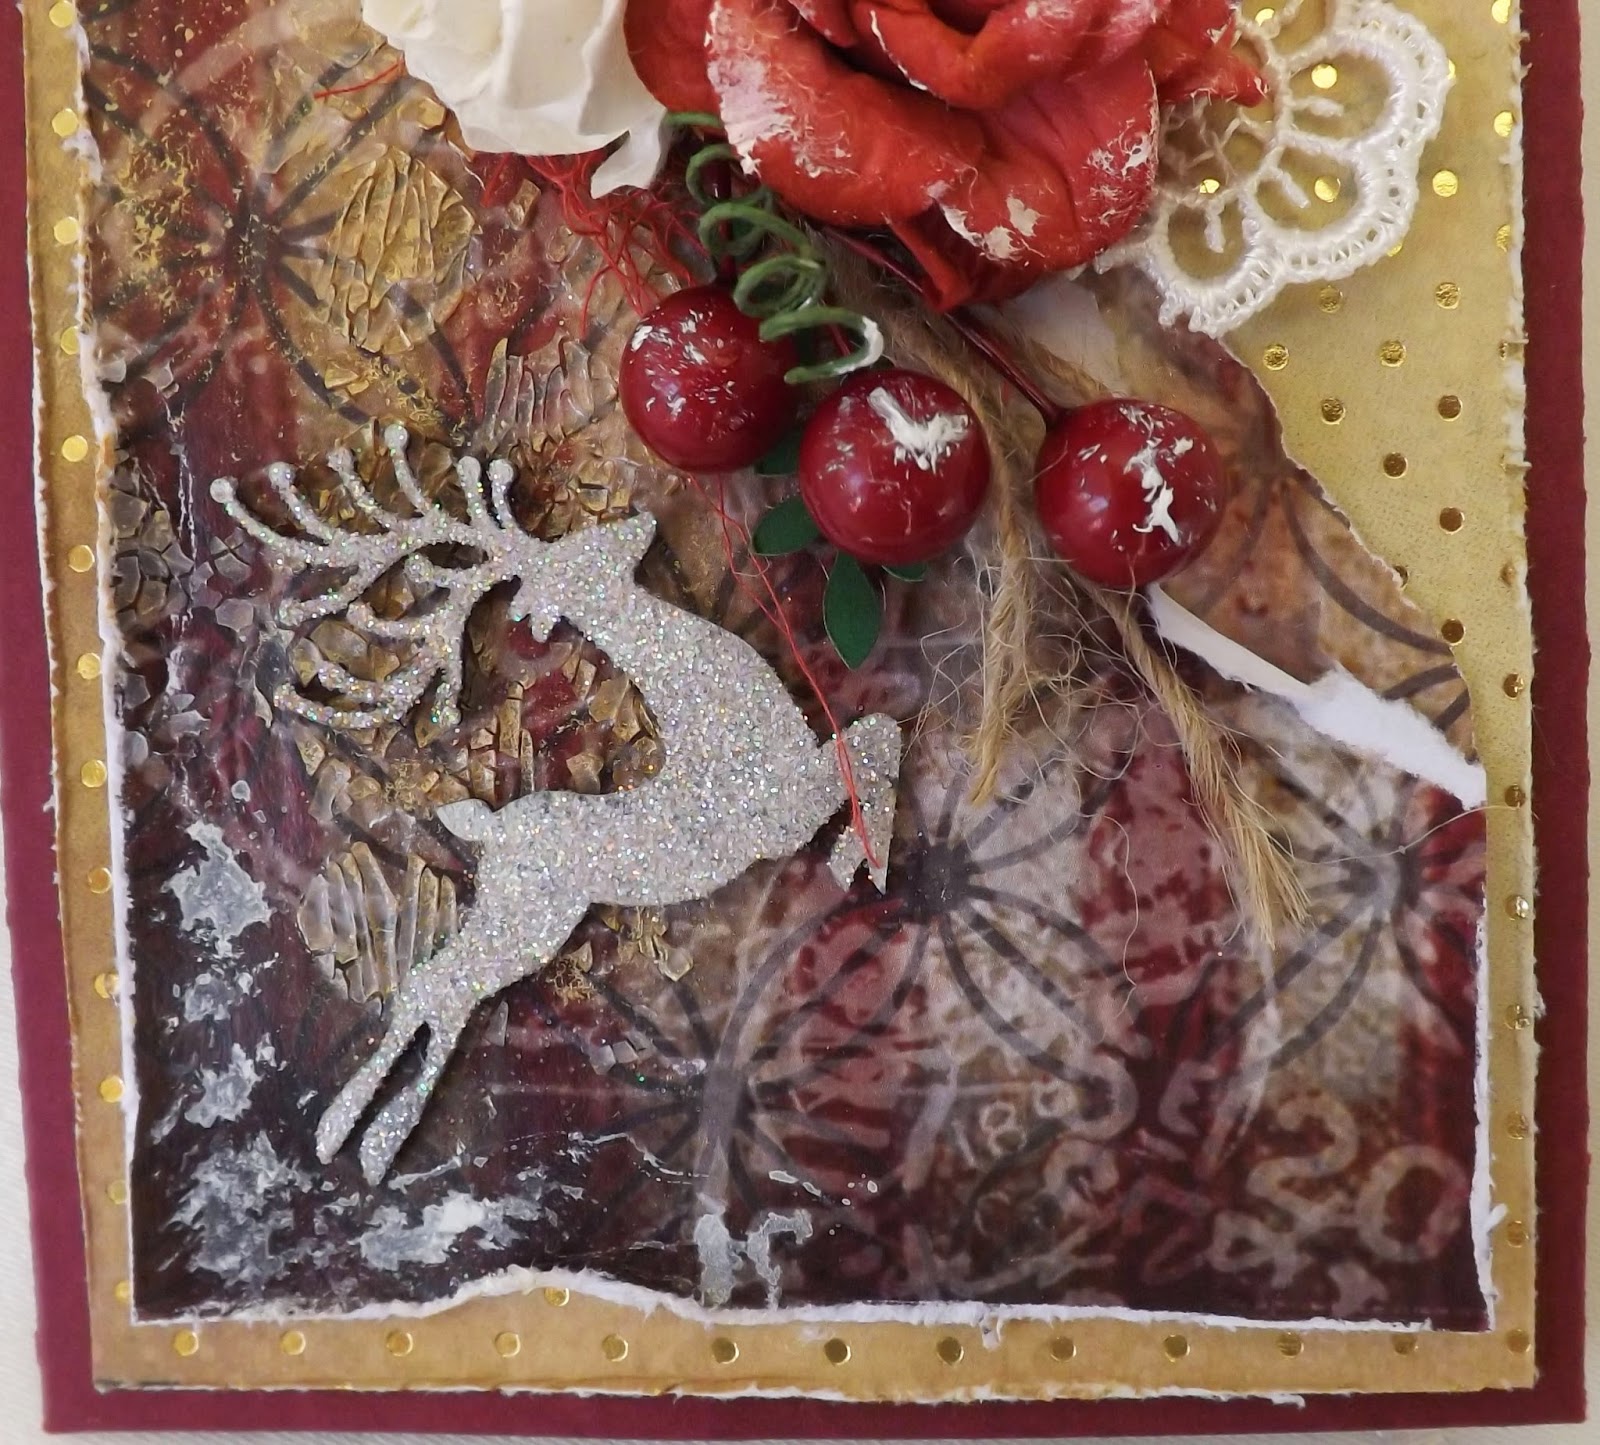
Kaisercraft DP for the first layer and then Meg's Garden 'A Gentleman on Time' DP torn diagonally and placed over the top.  Added a bit of texture with Crackle paint through a stencil and dry brushed randomly with gesso. 


Used some gorgeous 2Crafty chippies again.  A Card Word Circle from the Christmas Set (coloured with Scarlet VersaColor and coated in Glossy Accents) and one of their cute little Mini Reindeers which was simply covered in silver glitter. 


A little bit of gauze  (coloured with watered down red acrylic paint) was placed under the cluster and the flowers and that gorgeous little piece of lace ribbon are all available from Meg's Garden.


Once again, the inside was lined with more of the Gentleman papers.  The two pockets were created to hold Gift Cards and a tag for the verse.


On the second card I've used Meg's Garden 'Correspondence' papers.


Distressed the edges as you can see and, again, randomly brushed everything with gesso.  I also added some dry wall tape and sprayed over it with watered down acrylic paint.


The bit of gold chippie you can see is a piece from 2Crafty's  Bubble Grid Panel.  It was cut from a piece which I used on one of my other cards.  I don't throw out odd bits of chipboard like this, you never know when they might come in handy


The flowers are all available from Meg's Garden.  The green one started out white and was a semi opened rose.  When I coloured it with watercolour paint it opened out as you see here.


The inside is also lined with the Correspondence papers and this card only has the one pocket for a gift card.  I will print the verse on a tag and simply attach it to the other side.


That's all folks!!!  The last of my Christmas cards for this year.
This will be my last post before Christmas so, from me to you, I hope you have an absolutely wonderful Christmas.  Lots of love and laughter around the tree with friends and family and lots of the things that matter most to you.
Blessings and joy to you all.

Thank you so much for visiting and enjoy the rest of your day.

oxox Marg


Thursday, 18 December 2014

Christmas Cards #3

Hello again everyone!!  Hope you are having a wonderful day and thank you for dropping by!  I know how busy you all must be so I really appreciate you taking the time.  I'll make this post reasonably short and won't blather on too much.  (I hope)
Just sharing two more of the Christmas Cards I made this year.

For this first one I again used the 'Gentleman Collection' papers from Meg's Garden.


Gold embossed the edges and swiped some gesso in random spots but that is the only alterations I did with this one.  I've had that gold bauble vine in my stash since last Christmas and the white spirals is some paper covered wire I had which I just twisted around the end of a paint brush.


The tag is from Kaisercraft as is the stamp.


I've also had the burlap flower in my stash for some time.  I just sprayed it with some watered down acrylic paint and dry brushed it with gesso.


Different pockets on the inside this time.  One side was used for vouchers and the other held a tag with the message.  I'm afraid it got posted before I realised I hadn't photographed the tag.


The second one was made using Kaisercraft papers.


Did a bit of stamping with various stamps and added some micro beads before placing my cluster.


No pockets on this one.  Just a KC collectable on one side and the verse on the other.  The papers are from the Meg's Garden Correspondence Collection.


There you are, all done, and not too much blathering!!  LOL!!
Only a couple more to share  and I will do that in the next few days.
Only 7 more sleeps to Christmas!!!  Woo!! Hoo!!

Thank you so much for visiting and enjoy the rest of your day.
Take care and God Bless.
oxox Marg